Author: BGI Fertilizers

  • Is Organic Sustainable?

    Is Organic Sustainable?

    [cmsms_row][cmsms_column data_width=”1/1″][cmsms_text]

    I am not taking sides on the debate whether commercial organic production is sustainable.  The purpose of this discussion is to simply state some facts that hopefully cause the reader to really think about and learn before drawing any conclusions.  You must decide or decide not to decide.  Sometimes I come to the realization that I don’t know what I don’t know.  In this case, however I think I’m a little like Forrest Gump; “Maybe it’s both.”

    I’ll leave the definition of “Organic” up to you.  There are dozens. “Sustainability” is however succinctly  defined  by Dr. Ikerd at the University of Missouri as: “An agriculture that uses up or degrades its natural resource base, or pollutes the natural environment, eventually will lose its ability to produce…a sustainable agriculture must be all three – ecologically sound, economically viable and socially responsible.  And the three must be in harmony.”  The three key words are ecological, economical and responsible.

    I think it’s safe to say the general public is convinced organic farming is more sustainable, and conventional agriculture is not.  In fact, the World Watch Institute says organic farming “has the potential to contribute to sustainable food security by improving nutrition intake and sustaining livelihoods in rural areas while simultaneously reducing vulnerability to climate change and enhancing biodiversity.”

    Following is some evidence to consider before drinking the Kool-Aid:

    1) The Ben Gurion University in Israel recently published a study analyzing nitrate leachate concentrations in groundwater in conventional farming versus organic (compost fertilized) production systems.  Nitrate concentration profiles beneath the organic production area averaged 724 mg. per liter; under the conventional it was 38 mg. per liter.  EPA says safe drinking water should have a maximum of 10 mg per liter.  I’m not drawing any conclusions, but ecologically speaking, elevated nitrate levels in ground water are not indicators of sustainability.

    2) A study published in the “Proceedings of National Academy of Sciences” concludes organic farming methods lead to increased carbon sequestration or adding carbon to the soil.  This is a great thing! However, these methods were discovered and perfected 75 years ago.  Today there are much more sustainable ways to add carbon to the soil and avoid creating a monstrous carbon footprint.  Composted manure and other organic materials generate methane, nitrous oxide and carbon dioxide.  Unfortunately, methane is 21 times and nitrous oxide 295 times as much greenhouse effect gas as carbon dioxide.  Conventional methods of cover cropping and no till systems are more sustainable.

    3) Currently organic farming yields 20-50% less than conventional methods.  Think about this for a moment.  If organic methods were implemented:

    1. Up to twice as much land would have to be converted, i.e. deforestation, to farm land.
    2. Up to twice as much water would be consumed as a result of increased acreage.  Given the drought across the western U.S. and aquifer deficits, this may not be considered a water conservation strategy.

    This would certainly not be considered a move towards increased sustainability.  A study in the British Journal of Environmental Management found ammonia emissions, nitrate leaching and nitrous oxide emissions were higher utilizing organic production methods than conventional farming systems, as were “land use, eutrophication potential and acidification potential.”

    1. Scalable organic production requires mechanical weed control or tillage.  Tillage is also required to incorporate organic fertilizers or composts and manure into the soil.  However, the best approach to improving soil quality, increasing carbon levels or organic matter is what conventional agriculture calls no-till or minimum-till.  These systems are not possible under an organic regime.    As a result, the potential for erosion, leaching, run-off, volatilization and environmental degradation is apparent.

     2. The reason I hesitate to define “Organic” is in today’s mainstream media and academia it is a bit Orwellian and Double-Speak.  Let me give you two examples of “Organic” insecticides:

    1. Rotenone – while it is plant derived, it is extremely toxic to fish and is commercially used as a fish killer or a pisicide.
    2. Nicotine Sulfate – is extremely toxic to warm-blooded animals and causes birth defects.  Also, it’s been a while since my college inorganic chemistry class, but I believe sulfates are salts and very inorganic.

    A couple other facts that may urge you to at least question the norm:

    1. A study in the journal “Tree Physiology” recently published shows native Red Oaks in New York City grew 8-10 times faster than the same trees in the Hudson Valley.  It’s hot in the city!
    2. Scientists at the Smithsonian have shown trees along the Eastern Seaboard are growing faster as a direct result of increased carbon dioxide levels.  More carbon dioxide, more food?  Just asking…
    3. Carbon dioxide levels today are 400ppm in the atmosphere.  400 million years ago they were 4000ppm.  You would assume based upon what you’ve been told that global warming, sea levels, temperatures would have been rising off the charts.  The problem is there was no global warming 400 million years ago.  There was glaciation occurring.  I’m just saying…

    In conclusion, I simply ask you to revisit the assumptions you may have made about organic farming, organic fertilizers, global warming, greenhouse gas emissions, and agendas certain corporate and political interests may have.  Everyone has an agenda that is driven by control, power and the want of money.  Please ask the questions.  Please do the research.  Please draw your own conclusions. 2+2 still equals 4 but I’m not sure for how much longer.  Just ‘cause they say doesn’t make it so, unless they’re Hitler, or they say it enough times.  I don’t know.  I don’t have the answers.  Do the heavy lifting yourself and think!

    “And that’s all I have to say about that.”

    Take care,

    Tom


    [/cmsms_text][/cmsms_column][/cmsms_row]

  • Bougainvillea 101

    Bougainvillea 101

    [cmsms_row data_width=”boxed” data_padding_left=”3″ data_padding_right=”3″ data_color=”default” data_bg_color=”#ffffff” data_bg_position=”top center” data_bg_repeat=”no-repeat” data_bg_attachment=”scroll” data_bg_size=”cover” data_bg_parallax_ratio=”0.5″ data_color_overlay=”#000000″ data_overlay_opacity=”50″ data_padding_top=”0″ data_padding_bottom=”50″][cmsms_column data_width=”1/1″][cmsms_heading type=”h1″ font_weight=”400″ font_style=”normal” text_align=”default” target=”self” margin_top=”0″ margin_bottom=”20″ animation_delay=”0″]Introduction[/cmsms_heading][cmsms_text animation_delay=”0″]

    bou·gain·vil·le·a [boo-guhn-vil-yuh; -vil-ee-uh; boh-]

    The Bougainvillea is an immensely showy, floriferous and hardy plant. Virtually pest-free and disease resistant, it rewards its owner with an abundance of color and vitality when it is well looked after. The bougainvillea’s versatility is legendary. It can be coaxed into a small manageable pot plant or a sizeable tree, to spread itself vertically on a wall, or climb up a trellis and form a luscious crown or burst forth into graceful arches. It makes one of the best hedges, bushes, and curb-liners. And as for bonsai or topiary purposes, it has few equals, lending its complex branching to the pruning shears, which promote even more unique and graceful forms. It is probably true to say that without the bougainvillea, our roads, parks, and private gardens would be a lot less colorful that what we see today. Almost everywhere we go, its brilliant hues and cheerful bursts punctuate the lush green mantle that cloaks our tropical environment. Other flowering plants certainly pale in comparison. [1]

    Along with palms, sunshine, and beaches, the cascading blooms of bougainvillea provide one of Florida’s signature tropical images. As a profuse bloomer, bougainvillea is most striking during the winter, when it is at its peak and few other plants are able to provide color. Although it is frost-sensitive and hardy in zones 9b and 10, bougainvillea can be used as a houseplant or hanging basket in cooler climates. In the landscape, it makes an excellent hot season plant, and its drought tolerance makes bougainvillea ideal for warm climates year-round. Native to the coasts of Brazil, bougainvillea has a high salt tolerance, which makes it a natural choice for south Florida and other coastal regions. As a woody clambering vine, bougainvillea will stand alone and can be pruned into a standard, but it is perfect along fence lines, on walls, in containers and hanging baskets, and as a hedge or an accent plant. Its long arching branches are thorny, and bear heart-shaped leaves and masses of papery bracts in white, pink, orange, purple, and burgundy. Many cultivars, including double flowered and variegated, is available. [2]

    [/cmsms_text][cmsms_heading type=”h1″ font_weight=”400″ font_style=”normal” text_align=”default” target=”self” margin_top=”0″ margin_bottom=”20″ animation_delay=”0″]History of Bougainvillea[/cmsms_heading][cmsms_text animation_delay=”0″]

    A native to coastal Brazil, the bougainvillea was discovered in 1768 in Rio de Janeiro by French naturalist Dr. Philibert Commerçon (also sometimes spelled Commerson). The plant is named after his close friend and ship’s admiral Louis-Antoine de Bougainville, who commanded the ship La Boudeuse that sailed around the world between 1766-1769, and in which Commerçon was a passenger.

    Twenty years after Commerçon’s discovery, it was first published as ‘Buginvillea’ in Genera Plantarium by A.L. de Jusseau in 1789. The genus was subsequently split in several ways until it was finally corrected to ‘Bougainvillea’ in the Index Kewensis in the 1930s. Originally, B. spectabilis and B. glabra were hardly differentiated until the mid 1980s when botanists recognized them to be totally distinct species. In early 19th century, these two species were the first to be introduced into Europe, and soon, nurseries in France and England did a thriving trade providing specimens to Australia and other faraway countries. Meanwhile, Kew Gardens distributed plants it had propagated to British colonies throughout the world. Soon thereafter, an important event in the history of bougainvillea took place with the discovery of a crimson bougainvillea in Cartagena, a Spanish port in the Mediterranean, by Mrs. R.V. Butt. Originally thought to be a distinct species, it was named B. buttiana in her honour. However, it was later discovered to be a natural hybrid of a variety of B. glabra and possibly B. peruviana – a “local pink bougainvillea” from Peru. Natural hybrids were soon found to be common occurrences all over the world. For instance, around the 1930s, when the three species were grown together, many hybrid crosses were created almost spontaneously in East Africa, India, the Canary Islands, Australia, North America, and the Philippines.[1]

    [/cmsms_text][cmsms_heading type=”h1″ font_weight=”400″ font_style=”normal” text_align=”default” target=”self” margin_top=”0″ margin_bottom=”20″ animation_delay=”0″]Species and Hybrids[/cmsms_heading][cmsms_text animation_delay=”0″]

    Scientific classificationKingdom - Plantae
       Division - Magnoliophyta
         Class - Magnoliopsida
           Order - Caryophyllales
             Family - Nyctaginaceae
               Genus - Bougainvillea
                 Species - Bougainvillea  spectabilis
                           Bougainvillea glabra
                           Bougainvillea peruviana
                                 Cultivar (or variety)

    Bougainvillea spectabilis is a large climber with distinctive curved thorns, and hair on stems and leaves. The bracts are crinkled, fairly large, egg-shaped, and possess colors in the rose, rusty-red, and purple. Flowers are cream in color, slender, with very hairy tubes. Leaves are large, ovate to rounded, leathery in texture and hairy underneath. The bark is pale and corky. Branching is close and short, giving rise to a very dense plant. The first species collected, it was described from dried specimens by Willdenow (1798).

    Bougainvillea glabra has thinner branches that spread in many directions and have distinctive pointed triangle-shaped bracts that come in a range of whites, lilacs, mauves, and purples. Thorns are short, thin, and curved at the tips. Leaves are fairly evenly elliptical, widest about the middle. The small cream flowers are relatively big and tube-shaped. The also tend to flower virtually continuously, and often down the entire length of the branch. Originally described and named by Choisy (1849).

    Bougainvillea peruviana has a branching habit that is looser and more open. This is a climbing, spiny, spreading shrub with greenish bark. Thorns (spines) are thin, straight in youth and curved when older. Leaves are thin and ovate to broadly ovate. The small roundish bracts, usually in light to dark magenta colors, are quite delicate to the touch, and are crinkly in appearance. Flowering is recurrent after strong vegetative growth in response to dry weather. This species was described and named by Humbold and Bonpland (1808).

    Bougainvillea hybrids found today have been grouped into these three hybrid groups:

    • B. x buttiana (glabra x peruviana)
    • B. x spectoperuviana (spectabilis x peruviana)
    • B. x spectoglabra (spectabilis x glabra)

    [/cmsms_text][cmsms_heading type=”h1″ font_weight=”400″ font_style=”normal” text_align=”default” target=”self” margin_top=”0″ margin_bottom=”20″ animation_delay=”0″]Growth Cycles[/cmsms_heading][cmsms_text animation_delay=”0″]

    The bougainvillea has two distinct growth cycles:

      1. A vegetative growth period for several weeks — when new leaves and stems grow. If the plant receives enough sunlight, the plant will form buds during this time. If there is not enough sunlight, the plant will remain in vegetative cycle and not progress to the blooming period. This is usually the case if bougainvillea are grown as houseplants or brought indoors to winter-over.
      2. A blooming period of several weeks when little or no vegetative growth occurs. The length of time they will display color is dependent upon the health of the plant and the environment they are in; the more sun and heat, the better. With at least 5 hours of direct sunlight per day, a typical, healthy bougainvillea will remain in a blooming period for 3 to 5 weeks.

    [/cmsms_text][cmsms_heading type=”h3″ font_weight=”400″ font_style=”normal” text_align=”default” target=”self” margin_top=”0″ margin_bottom=”20″ animation_delay=”0″]Flowering Season[/cmsms_heading][cmsms_text animation_delay=”0″]Bougainvilleas’ natural habitat is equatorial where day and night lengths are almost equal. Bougainvillea in these areas (Singapore, Brazil, Kenya to name a few) tend to bloom year round, but in North America, the best flowering occurs when the night length and day length are almost equal (in Spring or Fall). If you live in the northern states, it’s too cold to grow bougainvillea in the Fall unless they’re housed in warm greenhouses – in which case you can enjoy colorful, blooming bougainvillea in October if you wanted! So depending on which continent or region you reside, it may not be the ideal blooming season for your area. Just because it’s hot doesn’t necessarily mean that it’s flowering season for bougainvillea. Case in point, bougainvillea do not bloom well in South Florida during the summer months (June – August) because of the long days and excessive rainfall. For those of us lucky enough to call South Florida home, you already know that the coolest months of the year (October through March) have the most spectacular show of bougainvillea.[/cmsms_text][cmsms_heading type=”h1″ font_weight=”400″ font_style=”normal” text_align=”default” target=”self” margin_top=”0″ margin_bottom=”20″ animation_delay=”0″]Climate[/cmsms_heading][cmsms_text animation_delay=”0″]Bougainvillea are tropical and must be protected from frost. In Zone 8 and cooler, you are almost limited to growing them in some kind of container unless you treat them as an annual (plant a new plant outdoors each year). Bougainvillea thrives in full sun. At least 5 hours a day of direct sunlight is the minimal light required for good bloom. More hours of direct sun are better. Less than 5 hours and the plant may not bloom very well. If grown indoors, in shade or partial shade, you will have nice vegetative growth, but little or no bloom. If possible, keep your bougainvillea outdoors, and keep in mind that southern exposure is ideal. If placed on a covered porch, screened-in patio or balcony, where the plant receives at least 5 hours of sun each day (afternoon sun is best), then you should see adequate blooms.[/cmsms_text][cmsms_heading type=”h3″ font_weight=”400″ font_style=”normal” text_align=”default” target=”self” margin_top=”0″ margin_bottom=”20″ animation_delay=”0″]Light Levels[/cmsms_heading][cmsms_text animation_delay=”0″]As a tropical plant, Bougainvillea requires full sun, or a light level of at least 4000 f.c.[/cmsms_text][cmsms_heading type=”h1″ font_weight=”400″ font_style=”normal” text_align=”default” target=”self” margin_top=”0″ margin_bottom=”20″ animation_delay=”0″]Soil[/cmsms_heading][cmsms_text animation_delay=”0″]Bougainvillea has an extremely fine root system, and should be planted in well-drained soils. Avoid soil mixes with high peat levels and water retention. These types of media retain too much water and will contribute to root rot; be sure to select a well-draining media.[2] The best growing mixture is one that is soil-less. Soil-less media are free of any disease pathogens, insect pests, and weed seeds. They are also generally lightweight and porous, allowing for a well-drained yet moisture-retentive mix. Premixed growing media are available from garden centers. However, be careful not to use peat or peatlite mixes alone. By themselves, these media tend to become compacted, too lightweight, and hard to wet. The greatest problem with peat/peatlite mixes is when the soil dries completely, the root ball will pull away from the side of the pot, and it is almost impossible to completely wet the soil again — the water simply runs down the side of the container and drains out the bottom. If your plant dries out and you use this type of mix, to re-wet it, let the pot sit in a pail of water until the soil ball is completely wet. Before using your mix to re-pot plants, be sure it is damp. Totally dry soil mixture is difficult to handle and may damage tender roots before the plant is watered.[4][/cmsms_text][cmsms_heading type=”h1″ font_weight=”400″ font_style=”normal” text_align=”default” target=”self” margin_top=”0″ margin_bottom=”20″ animation_delay=”0″]Fertilization[/cmsms_heading][cmsms_image align=”left” animation_delay=”0″]3387|https://www.bgi-usa.com/wp-content/uploads/BOUGAIN-2lb-Bag-Bougainvillea-Fertilizer-Bougainvillea-Plant-Food-0-e1470149674875.jpg|full[/cmsms_image][cmsms_text animation_delay=”0″]Bougainvillea are heavy feeders that require regular monthly fertilization during blooming season. Nitrogen and phosphate are critical to flowering, but do not over-fertilize with these two elements because it will add growth and inhibit blooming. This is the case when using generalized fertilizers like a 20-20-20 or 12-12-12. That’s why we’ve created a blooming fertilizer specifically for bougainvillea called BOUGAIN®. With Bougain’s 6-8-10 plus Minors formula, Nitrogen levels are just right for flowering, but low enough to limit excessive green growth. In addition, Bougain® contains 5% Iron — the secret for vibrant, beautiful color on bougainvillea.[/cmsms_text][cmsms_divider type=”dotted” margin_top=”5″ margin_bottom=”5″ animation_delay=”0″][cmsms_heading type=”h1″ font_weight=”400″ font_style=”normal” text_align=”default” target=”self” margin_top=”0″ margin_bottom=”20″ animation_delay=”0″] Salt Tolerance of Bougainvillea[/cmsms_heading][cmsms_text animation_delay=”0″]Good salt tolerance. [3][/cmsms_text][cmsms_heading type=”h1″ font_weight=”400″ font_style=”normal” text_align=”default” target=”self” margin_top=”0″ margin_bottom=”20″ animation_delay=”0″]pH Preference of Bougainvillea[/cmsms_heading][cmsms_text animation_delay=”0″]Bougainvillea does best with a soil pH of 5.5-6.5[/cmsms_text][cmsms_heading type=”h1″ font_weight=”400″ font_style=”normal” text_align=”default” target=”self” margin_top=”0″ margin_bottom=”20″ animation_delay=”0″]Trimming, Pruning, and Pinching[/cmsms_heading][cmsms_text animation_delay=”0″]

    What is the difference between trimming, pruning, and pinching a bougainvillea?

    The dictionary defines them as:

    • Prune: To cut or lop superfluous or undesired twigs, branches, or roots from.
    • Trim: To put into a neat or orderly condition by clipping, paring, pruning, etc.
    • Pinch: To remove or shorten (buds or shoots) in order to produce a certain shape of the plant, improve the quality of the bloom or fruit, or increase the development of buds.

    As you can see, pruning your bougainvillea is also an act of trimming it. Confused yet? Don’t be. Throughout our website and when responding to your questions in the forum, BGI uses “pruning” and “trimming” quite differently.

    [/cmsms_text][cmsms_heading type=”h3″ font_weight=”400″ font_style=”normal” text_align=”default” target=”self” margin_top=”0″ margin_bottom=”20″ animation_delay=”0″]Pruning[/cmsms_heading][cmsms_text animation_delay=”0″]When BGI writes about pruning a bougainvillea, we mean the act of removing entire branches or major structural parts of the plant. This could be anywhere from several inches to several feet depending on the size of your bougainvillea. Pruning is performed with pruning shears. Pruning a bougainvillea is recommended when entire branches are deterring from the overall shape of the plant, or jeopardizing the structural integrity of the bougainvillea.[/cmsms_text][cmsms_gallery layout=”gallery” image_size_gallery=”medium” gallery_columns=”4″ gallery_links=”lightbox” animation_delay=”0″]567|https://www.bgi-usa.com/wp-content/uploads/2012/01/Prune_Step-1-BGI-150×150.jpg,568|https://www.bgi-usa.com/wp-content/uploads/2012/01/Prune_Step-2-BGI-150×150.jpg[/cmsms_gallery][cmsms_heading type=”h3″ font_weight=”400″ font_style=”normal” text_align=”default” target=”self” margin_top=”0″ margin_bottom=”20″ animation_delay=”0″]Trimming[/cmsms_heading][cmsms_text animation_delay=”0″]When BGI writes about trimming a bougainvillea, we mean removing just the ends of branches or shoots. This could be anywhere from an inch to several feet, depending on the size of your plant. Trimming can be performed with hedge shears – either hand-held or electric & gas powered for very large plants. Hand-held hedge shears are recommended for a clean edge and for precise trimming. For professional landscapers trimming miles of bougainvillea, gas-powered hedge shears are very efficient, and get the job done nicely.[/cmsms_text][cmsms_gallery layout=”gallery” image_size_gallery=”medium” gallery_columns=”4″ gallery_links=”lightbox” animation_delay=”0″]569|https://www.bgi-usa.com/wp-content/uploads/2012/01/Trimming_Step-1-BGI-150×150.jpg,570|https://www.bgi-usa.com/wp-content/uploads/2012/01/Trimming_Step-2-BGI-150×150.jpg[/cmsms_gallery][cmsms_heading type=”h3″ font_weight=”400″ font_style=”normal” text_align=”default” target=”self” margin_top=”0″ margin_bottom=”20″ animation_delay=”0″]Pinching[/cmsms_heading][cmsms_text animation_delay=”0″]When BGI writes about pinching, we mean removing just the very tip of new shoots. Since new shoots are only a few inches in length (that goes for all sizes of bougainvillea), pinching the tip requires removing just an inch or less. New shoots are usually green, soft, pliable, contain tiny leaves or the beginning formation of a bud at the very tip, and ‘snaps’ off easily when pinched. Pinching is usually performed by hand. It can also be done simultaneously while trimming – for any act of removing the tip of new shoots is called pinching, whether by hand or cutting tool. If you do not want to trim your bougainvillea and only want to pinch it, it will have to be done with a pair of compact hand shears or by hand. Wearing gardening gloves is recommended when pinching by hand.[/cmsms_text][cmsms_gallery layout=”gallery” image_size_gallery=”medium” gallery_columns=”4″ gallery_links=”lightbox” animation_delay=”0″]563|https://www.bgi-usa.com/wp-content/uploads/2012/01/Pinch_Identify-New-Shoots-BGI-150×150.jpg,565|https://www.bgi-usa.com/wp-content/uploads/2012/01/Pinch_Step-1-BGI-150×150.jpg,566|https://www.bgi-usa.com/wp-content/uploads/2012/01/Pinch_Step-2-BGI-150×150.jpg,564|https://www.bgi-usa.com/wp-content/uploads/2012/01/Pinch_Pinched-Bougainvillea-Shoot-BGI-150×150.jpg[/cmsms_gallery][cmsms_text animation_delay=”0″]Bougainvillea may be pruned, trimmed, and pinched at any time of the year. Bloom initiation does not depend upon trimming – a bougainvillea has a bloom cycle followed by a rest period whether trimmed or not. However, trimming or pinching is recommended after the end of each blooming cycle or at the beginning of the rest period to promote branching and budding for the next bloom cycle. A bougainvillea, like most vining-type plants, will continue to grow outward without sending out side branches from each leaf-bud point unless the stem is trimmed or pinched. If you want one long stem, then don’t pinch out the tip. By pinching out the tip, most bougainvillea cultivars will send out new stems from 2 to 3 leaf-buds below the cut, giving you a fuller plant with more buds. Some varieties do not send out any new stems, so their appearance is always stringy or bare. So it is important when growing a bougainvillea, not to wait for the branches to grow very far beyond your desired size before you remove all the tips – either with shears or hand-pinching — otherwise, the growth will be bare in the center of the plant, and the overall look will be misshapen.[/cmsms_text][cmsms_heading type=”h1″ font_weight=”400″ font_style=”normal” text_align=”default” target=”self” margin_top=”0″ margin_bottom=”20″ animation_delay=”0″]Planting In Containers[/cmsms_heading][cmsms_text animation_delay=”0″]

    Generally, bougainvillea can be grown in anything that will hold soil and allow proper drainage. Some of the more traditionally used containers include terra cotta (clay) pots, plastic pots, hanging baskets, wire baskets lined with sphagnum moss or fibrous liners, concrete planters, planter boxes, and bushel baskets. When BGI was on a bougainvillea exploration trip through Southeast Asia, we saw beautiful bougainvillea growing out from old laundry baskets and tires! Just remember that the container MUST have proper drainage. If you place your pot directly on the ground, the roots may emerge from drainage holes and find their way into the earth. To prevent this, place wooden slats or four bricks (in a T-design) under the pot. The air will naturally prune the roots that are exposed.

    It’s very important to remember that a bougainvillea does not tolerate standing in water. Whatever container you choose, consider these tips:

      • Drainage: Bougainvillea must have it.
      • Insulation: Avoid using black containers in full sun.
      • Large enough: The container must be large enough to hold the minimum amount of soil required for mature plants to grow in.
      • Weight: Will it be too heavy to move? Use broken pieces of clay pots or recycle styrofoam packing peanuts to line the bottom of the container rather than filling it fully with soil mix. This should also help with drainage and keeping drainage holes clear of debris.

    [/cmsms_text][cmsms_heading type=”h1″ font_weight=”400″ font_style=”normal” text_align=”default” target=”self” margin_top=”0″ margin_bottom=”20″ animation_delay=”0″]Repotting Bougainvillea[/cmsms_heading][cmsms_text animation_delay=”0″]A bougainvillea blooms best when pot-bound so do not be tempted to re-pot unless you must. It is best to leave the plant in its original container until the roots have replaced all of the soil and you can’t keep the plant well watered. For example, it is not unusual to grow a bougainvillea in a 1 gallon pot for three or more years. When it is necessary to re-pot remember that a bougainvillea has a very delicate root system and a fragile root to stem connection. Handle bougainvillea with care. Root pruning is not recommended when re-potting bougainvillea – in fact, disturb the roots as little as possible because the plant might go into shock and take weeks to recover. Bougainvillea love to be pot-bound, so pot in the smallest container available for the purpose you desire. Re-pot into larger pot sizes gradually. For example, move a plant in a 6″ pot into a 9″ or 10″ pot. Several years later, you can then move up to a 14″ pot. The root system needs time to grow into each new pot.[/cmsms_text][cmsms_heading type=”h1″ font_weight=”400″ font_style=”normal” text_align=”default” target=”self” margin_top=”0″ margin_bottom=”20″ animation_delay=”0″]Frost Tolerance[/cmsms_heading][cmsms_text animation_delay=”0″]Bougainvillea require winter protection when temperatures fall below freezing (32F), and in some cases below 40F if there is accompanying wind. A light frost will not kill a mature bougainvillea, but may for a young planting. As quickly as one day or up to one week after the frost, it is normal for all the bougainvillea leaves and bracts to drop. Any remaining foliage on the plant may have brown or black edges to them, giving them a burnt appearance. We call this tip-burn or frost-burn. Cold winds have “burned” the leaves that have lost too much water through transpiration. In this case, the plant will re-grow, but only if not subjected to further frosts for longer durations.[/cmsms_text][cmsms_heading type=”h1″ font_weight=”400″ font_style=”normal” text_align=”default” target=”self” margin_top=”0″ margin_bottom=”20″ animation_delay=”0″]Winter Protection[/cmsms_heading][cmsms_text animation_delay=”0″]You have two options when deciding what to do with your tropical bougainvillea in times of frost or freeze. Both options give you about the same level of success rate – moderate to high. The more mature and healthy the plant…the better chances of survival during Winter months.[/cmsms_text][cmsms_heading type=”h1″ font_weight=”400″ font_style=”normal” text_align=”default” target=”self” margin_top=”0″ margin_bottom=”20″ animation_delay=”0″]Wintering Over Bougainvillea Indoors[/cmsms_heading][cmsms_text animation_delay=”0″]

    For bougainvillea in pots, they can be wintered over in basements, garages, or other cool and lower light areas. Under these conditions they go into a dormancy state and defoliate. Occasional watering during dormancy (once or twice a month) is needed until they start to grow again in the Spring where they once again need to be moved into high light. The other option is not to force them into a dormancy state, and place them indoors on a sunny south facing windowsill. You will have to water them more frequently – about as often as a houseplant – and they probably will not have any color. You may see a bract or two sporadically appear, but more likely than not, it will look like a common green houseplant until spring when you can place it outdoors into high light.

    If you have planted your bougainvillea in the soil outdoors and want to dig it up and move it indoors for the winter, expect the plant to go into dormancy sooner than if it had been in a container — the root damage as a result of digging will be the cause rather than the cool weather — but the plant should survive this kind of transplanting. Make sure to dig as far away from the root system as you possibly can. It’s important not to sever the roots; take care to dig up the entire root ball and especially in one piece.

    For both options, after you bring it back outdoors in the Spring, prune back any dead or damaged stems, and begin watering and fertilizing again. Gradually increase light levels by placing in partial shade for the first few days and working up to direct sunlight by the second week.

    [/cmsms_text][cmsms_heading type=”h1″ font_weight=”400″ font_style=”normal” text_align=”default” target=”self” margin_top=”0″ margin_bottom=”20″ animation_delay=”0″] Winter Protection for Outdoor Bougainvillea[/cmsms_heading][cmsms_text animation_delay=”0″]When bougainvillea are planted in the landscape and cannot be moved, you can protect it by covering and applying water or heat. Cover bougainvillea and the surround soil around the plant with thermal covers made for plants – aka. plastic sheeting, frost cloths. A trick for applying heat is to drape lit, outdoor holiday lights prior to covering with thermal covers. Do not use lights without a cover! If the plant is left exposed to the wind, the heat from the light will dry out the plant even further. Use lights and covers only at the coldest and windiest times of day/night. Turn off lights and uncover when threat of frost is over. Keep outdoor bougainvillea well watered in frost or freezing weather. Frost injury occurs when ice crystals form on the leaf surface drawing moisture from the leaf tissue. The damage from this dehydration will be less severe if the plant is not already drought-stressed.[/cmsms_text][cmsms_text animation_delay=”0″]

    Sources:

    [1] Simon, Eric. “Brighten Up With Bougainvillea” 2005

    [2] Schoelhorn, Richard and Alavrez, Erin.

    “Warm Climate Production Guidelines for Bougainvillea”.

    University of Florida/ IFAS Extension. October 1, 2002.

    [3] Knox, Gary W. and Black, Robert J.

    Salt Tolerance of Landscape Plants for South Florida. Table 5. Salt Tolerance of Vines.
    University of Florida/ IFAS Extension. Reviewed March 2000

    [4] Braswell, Gordon. “Gordon Braswell’s Bougainvillea Information”.

    [/cmsms_text][cmsms_text animation_delay=”0″]

    Click here to change this text

    [/cmsms_text][/cmsms_column][/cmsms_row]
  • Citrus 101

    Citrus 101

    [cmsms_row][cmsms_column data_width=”1/1″][cmsms_text]

    Introduction

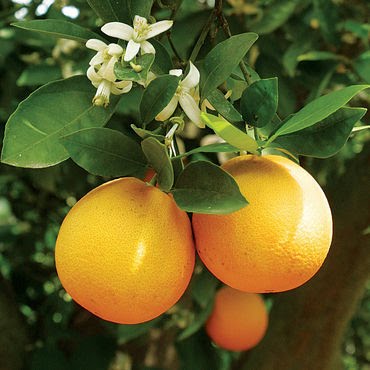
    Citrus Plant CareCitrus plants have been cultivated in an ever-widening area since ancient times; the best-known plant examples are the oranges, lemons, grapefruit, and limes.

    Citrus flower buds begin to form in early winter and develop through late winter and spring. Most flowers don’t result in the formation of fruit because more than 99% of them usually fall off. Because the number that does become fruit depends largely on temperature and moisture, adequate water is very important during and immediately after flowering.

    After bloom, fruit develops from five to 18 months, depending on the variety and growing area. Unlike many other types of fruit, most citrus can be left on the tree without becoming overripe.

    Citrus is a subtropical fruit tree and is limited to areas that do not regularly experience freezing temperatures. Check your hardiness zone.

    Common Varieties

    Citrus fruits are classified into different groups by the citrus industry according to their characteristics and use. Sweet oranges and grapefruits are accepted as a regular part of the diet and consumed in some from every day by many people.

    Specialty fruits like tangerines, mandarin, or hybrids are more so used for holidays or dessert uses.

    Acid fruits like lemons and limes are used as thirst-quenching drinks, garnishes on the dinner table, and ingredients for refreshing pies or delicious cakes.

    Dual-Purpose Fruits are those which combine unusual ornamental value with useful fruit. Kumquat, calamondin, and Meyer lemons are examples.

    Citrus Plant Care & Maintenance

    When selecting a tree consider a few main issues:

    Soil

    Citrus will grow in most soils from sandy to clay, provided it drains well. Sandy soils must be watered and fertilized more frequently than soils with higher clay content. The optimum pH levels for your citrus should be 5.5-6.5.

    Watering

    Water is the first requirement of a young tree, and it will be used up rapidly by trees with a good head of foliage. Twice a week supply about 8 to 10 gallons of water during watering. After the first month watering can be less frequent, but whenever new growth is observed to wilt in mid-afternoon, begin watering heavily again.

    Fertilization

    Fertilization should start when swelling buds indicate that growth is beginning (or, three weeks after planting.) During the first year, fertilization with a citrus specific fertilizer like CitrusGain 8-3-9 is important and should occur every 6 week during February through October. As the trees get older, a good rule of thumb is to spread the fertilizer as many feed beyond the drip line of the canopy as the age of the tree in years (up to 10).

    Cross-pollination, some varieties (mandarins) produce very little fruit unless a compatible tree is planted nearby to provide cross-pollination.

    CitrusGain is the easiest way to ensure citrus plants have their meaningful elements. It is formulated specifically for citrus and other plants having similar nutrient requirements.

    [wwcAmzAffProducts asin=”B00CO5F324″][/wwcAmzAffProducts]

    Pruning

    During early development, it is important to remove suckers from the base of the tree. These shoots are likely to be the root-stock variety, will not produce fruit, and without removal will interfere with tree development. Mature citrus do not require pruning of the canopy for product or tree health. While hand pruning opens up the trees to allow more sunlight into the center, mature citrus, unlike most other fruit trees, don’t require regular pruning.

    Freeze Sensitivity

    If freezes are expected every few years, more cold-tender citrus types should be avoided and only the hardiest should be chosen. Protection from frost is critical.

    Most citrus will freeze when fruit temperature drops to 27-28°F. One usually successful method for combating cold – water! By applying water, the heat built up in the soil during the day is lost more slowly, and air temperatures around the fruit stay warm a little longer.

    Pests & Disease

    Some varieties are susceptible to certain insects and diseases requiring frequent spraying. In many cases, when there are only a few citrus trees in the landscape, they may not require any pest control.

    Most citrus can be successfully grown without chemical pesticides to control insects and diseases in most landscape situations. Fruit produced may have external blemishes, but this will usually have no effect on internal fruit quality. If pest problems warrant, neem oil can be used to suppress populations of insect, mites, and scales. Copper fungicide can be used to control most fungal diseases. Many citrus pests are under natural biological control, assisting in keeping most incest pests at low levels.

    Pest control should be undertaken only as the need becomes evident.

    Common Pests

    • Citrus aphids
    • Citrus gall wasp
      • Citrus leaf-miner
      • Cottony cushion scale
      • Crusader bug
      • Fuller’s rose weevil
      • Katydid
      • Light brown apple moth
      • Long tailed mealybug
      • Managing Queensland fruit fly
      • Mite pests of citrus
      • Red scale
      • Spined citrus bug
      • Thrips

    Common Diseases

    • Armillaria root rot
    • Citrus blast
    • Citrus canker
    • Citrus exocorti

    [/cmsms_text][/cmsms_column][/cmsms_row]
  • Hibiscus 101

    Hibiscus 101

    [cmsms_row][cmsms_column data_width=”1/1″][cmsms_text]

    Introduction

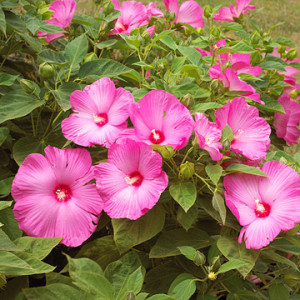
    HibiscusHibiscus is a large shrub or small tree that produces huge, colorful, trumpet-shaped flowers over a long season. Other common names include Chinese hibiscus and tropical hibiscus.

    The eight hibiscus species that are considered to be the ancestors of the modern exotic hibiscus were originally native to Mauritius, Madagascar, Fiji, Hawaii, and either China or India. Similar in many ways to today’s hibiscus, the ancestors were characterized by free flowering, tall and willowy bushes, and the ability to form seeds using their own pollen that would grow into plants that are genetically identical to the parent plants.

    Common Varieties

    Hibiscus is placed into two groups, tropical and hardy. Knowing which you have can mean the difference between you being able to place it out in the landscape or having to bring it in for the winter. The care for the two groups is about the same, however.

    The basic characteristics of Hibiscus are single or double forms with variations in the number of arrangement of petals.

    Although the six basic colors are red, orange, yellow, white, lavender, and brown, there is a broad range of color combinations, color shades, and flower forms.

    Soil, Watering, Fertilization, & Pruning

    The use of Hibiscus as an evergreen shrub is Florida is limited to the southern half of the state. The limiting factor in north FL is low temperatures. Plants are highly susceptible to death when ground temperatures dip to 28-30 degrees. Fences, screens, buildings, other trees, frost cloth, or blankets may help to protect your hibiscus during a few cold nights.

    Hibiscus is not tolerant of salts, salt spray or saline irrigation can be fatal to your Hibiscus.

    A minimum of half a day of direct sunlight is recommended for the healthiest growth and flowering.

    Soil

    A wide range of well-drained soils is suitable for hibiscus if proper fertilization is provided. A soil pH of 5.5 to 6.5 is preferred. Hibiscus grown on alkaline soils may suffer from micro nutrient deficiencies; consider choosing a hibiscus-specific fertilizer, like HibisGain 12-6-8 to ensure your plant is receiving important nutrients.

    Watering

    Hibiscus requires well-drained soils, like BGI Select Soil. They do not tolerate saturated soils or “wet feet.” However, they do need adequate water and will need routine watering during periods of drought. Consider watering very heavily once a week during a drought.

    Fertilization

    The key to success with heavy-feeding hibiscus plants is to fertilize lightly and often. Regular fertilization of hibiscus is essential to maintain healthy and vigorous plants. Hibiscus bloom best when fertilized lightly and often. Irrigation after fertilization with help prevent burn. Avoid fertilization on or near the stem/trunk, spread the fertilizer beneath the canopy to slightly beyond the branches.

    HibisGain is the perfect mix for more than just your Hibiscus; our 12-6-8 formula is a great contender as an all-purpose dry fertilizer.


    [wwcAmzAffProducts asin=”B00CO8JC3W”][/wwcAmzAffProducts]


    Pruning

    Heavy pruning is best done in early spring, and should not be done in late fall or during winter. Light maintenance pruning may be done at any time of the year to remove diseased or dead wood, rubbing branches, and weak or droopy growth.

    Hibiscus blooms are produced on new growth, so blooming is delayed and reduced is the plants are pruned heavily during the active growing season.

    Pests and diseases

    Several types of chewing and sucking pests that feed on leaves, buds, or flowers can cause issues at one time or another. Generally, pests can be controlled with applications of contact of systemic pesticides. Routine inspections instead of routine spray schedules may reduce the quantity of pesticides required. Pesticides can be destructive to your plant, as Hibiscus is quite sensitive to them.

    Premature flower bud drop is often a problem with hibiscus. Some varieties, especially some doubles, are characterized by premature bud drop. Some varieties bloom well during one period of the year and consistently drop their buds are other times.

    Pests

    • Spider Mites – May show signs of mottled yellow leaves that worsen over time.
    • Thrips Signs of bus discoloration and falling off.
    • Gall Midge Buds turn yellow and begin to fall off.
    • Whiteflies White mess on leaves or white-colored flies near plant.
    • Aphids Black, white, or green visible bugs on plant.
    • Mealybugs Bright white, small, cottony spots on leaves.
    • Snow Scale Bright white, tiny, specks on bark.
    • Fungus Gnats or Shoreflies Small dark bugs flying around plants.

    Diseases

    • Dieback Disease – Wilted leaves on one branch.
    • Wilt Disease – All leaves on plant wilted.
    • Leaf Fungus – Black spots on leaves

    [/cmsms_text][/cmsms_column][/cmsms_row]
  • Palm Trees 101

    Palm Trees 101

    [cmsms_row][cmsms_column data_width=”1/1″][cmsms_text]

    Introduction

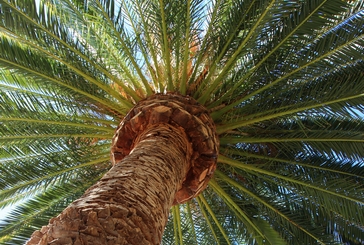
    There are over 2,500 different palm tree species in the world. Palm trees can be separated into few major types depending on their trunk, leaf structure, growth rate, size, and cold tolerance. Aside from this basic segregation, palms also differ in salt and drought tolerance, leaf color, fruit and flower production. While most grow in tropical and subtropical climates, others can tolerate cold temperatures down to -20F.

    Common Varieties

    Common varieties include Royal Palm, Sabal Palm, Canary Island Date Palm..The list goes on with over 2,000 species. Others include:

    • Bismarck Palm
    • Cabbage Palm
    • Carpentaria Palm
    • Chinese Fan Palm
    • Christmas Palm
    • Fishtail Palm
    • Key Thatch Palm
    • Macarthur Palm
    • Pindo Palm
    • Paurotis Palm
    • Pygmy Date Palm
    • Queen Palm
    • Senegal Date Palm
    • Sentry Palm
    • Washington Palm
    • Windmill Palm
    • Yellow Butterfly Palm

    General Information

    With Palms it is important to take special care for their roots. Unlike a typical tree, a Palm does not have roots growing deep beneath the tree. Root balls branch very little and do not increase in size with the growth of the above ground tree.

    Most palms have a single trunk (coconuts), though some species grow as clustering or clumping palms (fishtails)

    A Palm has a single growing point at the top of its trunk. This point and its surrounding tissues are called the terminal bud. If the terminal bud is injured, the palm may die. The roots of a palm do not thicken like those of other trees so palms are less likely to damage sidewalks and utilities.

    Most palms are container grown at nurseries, though some may be field specimens. Either way, choosing a healthy palm at the get-go will help for health down the road.

    Soil

    An important factor for the health of a palm tree is its soil. Compacted, nutrient-deficient soils found in most urban environments do not contain the components necessary for a palm to truly thrive. Palms receive a bulk of their nutrients from the top soil and the top of the nearby ground meaning proper fertilization is required.

    Watering

    For new palms, you will need to water at least twice a week for the first 6 months. Add enough water to ensure moisture is penetrating a foot and a half of the soil. If you soil is sandy, make sure to add extra water as sandy water doesn’t maintain moisture.

    For established palms, watering will depend on the climate, season and rainfall frequency. In many areas, twice a month during the summer decreasing to once every six weeks during the colder season should be enough.

    Fertilization

    According the University of Florida’s agricultural research division, IFAS, 8-2-12 is the ideal mix for Palm trees and ornamentals alike. Palm nutritional requirements vary considerably from other plants, particularly turf. You may find the exact IFAS mix in PalmGain 8-2-12, available at Home Depot and our online store.


    [wwcAmzAffProducts asin=”B00CO8I8NM”][/wwcAmzAffProducts]


    Pruning

    Most trees shed their fronds naturally. Only yellowing/browning/old fronds should be removed as removing young fronds takes needed nutrients away from the tree. Remember to never trim too close to the trunk of your Palm. The bark is easily damaged and the resulting wounds are entry points for insects and disease.

    Lastly, never prune or off more of the Palm’s leaves in one year than are produced during that time. Research done by E. J. H. Corner (1966) indicates that each species of Palm has a set number of green live fronds with the same number of developing fronds inside the bud area of the Palm Trees. As a new frond emerges, the oldest frond dies. The age that a frond may attain will be determined by many factors including size of mature Palm Trees, number of fronds produced, etc.

    Pest and Diseases

    Palms are susceptible to infections by viruses, bacteria, and fungi, as well as to infestation by insects and other pests. Infectious agents and pests vary widely by region and county. The most common are listed below,

    Pests

    Cabbage Palm Caterpillar

    Cabbage palm caterpillars, found throughout Florida, target the cabbage palmetto almost exclusively. They rarely kill palm trees but the insects do destroy the trees’ blossoms. They are a nuisance to humans as well because they often enter homes looking for suitable places to pupate. Control by insecticides is possible under certain circumstance if carefully managed.

    Giant Palm Borer

    The borer is a large and quite ugly beetle whose larvae have a taste for the wood of the Washingtonia and Phoenix varieties. Borer grubs can live inside a palm trunk for up to nine years before exiting as beetles through quarter-sized holes.

    Palm Budworm

    The budworm is beetle whose larvae feed on the flowers of a range of fan palms. The caterpillars are about an inch long and a pink-green in color.

    Palmetto Weevil

    The Palmetto Weevil can be found throughout Florida, as far west as southern Texas and as far north as South Carolina. It is North America’s largest weevil. This pest has a taste primarily for the Cabbage Palm (sabal palmetto) although it will infest Saw Palmettos (serrenoa repens) and, occasionally, Canary Island Date Palms (phoenix canariensis), Washington Palms (washingtonia), Royal Palms (roystonea), and some coconut palms.

    Royal Palm Bug

    Royal Palm Bug feeds on only one plant, the royal palm, and the female lays one egg a day during the spring. The bugs rarely kill the host tree but the damage they do can be unsightly and they are difficult to control given the height of mature royal palms. These insects are the only North American members of the Thaumastocoridae family.

    Thrips

    North America’s thrips make up an extremely large family of insects. Of the plant feeders alone, there are 264 species. And some of these species have a taste for palm trees, feeding on flowers and leaves by puncturing the surfaces to suck out sap. Thrips are not lethal to palms but the feeding of the adults can discolor and wilt leaves. In addition, in intensive infestations their unsightly black droppings can become noticeable on leaf surfaces.

    Diseases

    Bud Rot

    Bud rot is caused by a fungus which causes the heart fronds of a palm tree to wilt and die. Tree death can occur soon afterward. California and Mexican palms are the most vulnerable.

    Fusarium Wilt

    Fusarium wilt is another palm tree fungus. Signs of wilt are fronds wilting, losing their green luster and, finally, dying. Once a tree is infected, there is no cure and the diseased tree may have to be removed.

    Ganoderma Butt Rot

    Ganoderma butt rot is a relatively new and lethal disease of Florida palm trees. It is caused by a fungus, Ganoderma zonatum, which invades the base or butt of palm trees up to a height of three to four feet above the ground. The disease was first discovered in Florida in 1994 and in only a few years it has spread to infect palms throughout the state. At this time, it cannot be said with certainty that there are any palm trees resistant to ganoderma butt rot.

    Lethal Yellowing

    Lethal yellowing is a disease first noticed in the Caribbean region of North America about 100 years ago. However, it was not until the 1950s and a devastating outbreak in Jamaica and the Florida Keys that the economic consequences of lethal yellowing were recognized and intensive research begun.

    Weather

    Cold weather can affect plants in a variety of ways. First, frost or freezing temperatures can damage the actual tissue of the plant as well as limiting the conduction of water through the trunk. As well, cold weather will slow down the growth of your palm and reduce the activity of the roots. As this occurs, the palm is weakened and susceptible to the perils of disease.

    Blankets wrapped around the trunk and top of the soil is an easy way for homeowners to protect their palm from a cold snap. Be sure to remove the blankets after a few days, when the weather has warmed up.

    [/groups_member]

    [/cmsms_text][/cmsms_column][/cmsms_row]
  • BGI Select Quick-Draining Soil

    quick draining soilSoil is an important part of plant growth, and sometimes it is not given as much importance as it should. Quality of soil helps determine how the plant grows. Bougainvillea and other plants like cacti, bonsai trees, and even watermelons are all examples of xerophytic plants, with a low moisture requirement.

    Well-drained soil allows water to be added to the pot, and is able to soak in evenly, and lets excess water flow easily from the drainage holes at the bottom of the pot.  With that said, it is very important to keep the drainage holes clear at all times. One option is to place a few pebbles at the bottom of the pot, to ensure that the holes do not become congested with excess soil.  If you wish for your plant to grow, do not pot your xerophytic plant in a container with no holes.

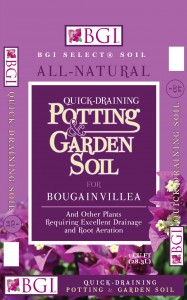
    Plants such as bougainvilleas that need excellent drainage, as well as to aerate their roots are perfect candidates for BGI’s Select Quick-Draining Soil. BGI’s Select Quick-draining soil is made to allow plant roots to breathe. These plants do not need to have a soil that absorbs a lot of water, on the contrary, too much water (or a waterlogged soil) will be damaging to the growth and progress of your succulent plants.

    BGI Select Quick-Draining Soil is an all-natural mixture of pine bark, Canadian peat, Florida peat, and dolomite.

    In order to drain well, soil should have large air spaces. Consistent moisture levels are important to maintain in order to help your plants grow. BGI’s Select Quick-Draining Soil drains soil well enough to avert the constant saturated effect but at the same time does not require its caretaker to water everyday.

    [button link=”http://www.bgi-usa.com/store/#!/~/product/category=1643774&id=8136463″ variation=”hot_pink”]Buy Now[/button] Place your BGI Select Quick-Draining Soil order today!

  • PalmGain Palm Tree Fertilizer

    Palm Plant FertilizerDifferent species of plants have unique fertilizer requirements. Palm tree fertilizer, fern fertilizer, ixoras fertilizer, cycad fertilizer, and ornamentals fertilizer needs can all be cared for by one product, PalmGain 8-2-12 palm fertilizer. These attractive plants require a fertilizer which is a mixture of iron, nitrogen, potassium, sulfur, magnesium and other minerals and nutrients in high amounts. When properly fertilized, these plants will take on the radiant hues and luscious green, which signifies a healthy plant. PalmGain takes the mystery out of fertilizing these varieties of plants.

    A palm tree has special needs and fertilizing too much or not enough can cause damage to the tree. Trees may not grow properly if they do not have adequate amounts of specific minerals and nutrients. When planting a palm tree, wait approximately 4 to 6 weeks, to make sure that water and soil are in balance and to avoid transplant shock. Care should be taken when fertilizing a palm tree, gently work the dry fertilizer into the soil away from the trunk and away from the delicate roots. The soil must be moist, not dry and the palm needs to be watered after the fertilizer is applied. A tree will exhibit various signs of illness, if it is deficient in any of the major chemical and nutritional elements. Using a well balanced palm tree fertilizer can eliminate these problems.

    Stop going out to buy specialty fern fertilizer, ixoras fertilizer, cycad fertilizer, ornamental fertilizer and other treatments, when PalmGain will supply the perfect formula. Ferns, ixoras, cycad and other plants of this type have similar nutritional needs, the same as palms. Plants, which receive proper care, will thrive, but it is essential to understand their nutritional requirements. PalmGain can give plants the support needed to be healthy, with lush vegetation. When helping palms and plants with similar needs, trust the fertilizer, which will make them flourish.

    Place your PalmGain order today

  • All Purpose Liquid Fertilizer

    Grow & Gain

    Grow & Gain is an all-purpose liquid fertilizer that contains an ideal mix of nutrients and beneficial ingredients for your lawn, garden and trees.

    The concentrated formula boosts the strength and maturity of both indoor and outdoor plants. This liquid fertilizercontains organic acids and chelated micronutrients that support plant nourishment, foliage health and flower growth.Grow & Gain’s spray fertilizer is easy to use and helps plants flourish by improving their absorption of nutrients, resistances and growth rate.The fast-acting liquid fertilizernourishes your plants’ roots, soil, stems, foliage, flowers and fruits. The gentle organic acids create a neutral environment in which your plants may flourish. These acids help with nutrient absorption while enriching the soil and improving water retention.Chelated micronutrients are essential to plant nourishment and are easier for all types of plants to absorb. The ingredients improve the soil and provide more efficient absorption of water and nutrients. By using this spray fertilizer for your vegetation needs, you will achieve healthy lawns, fruitful harvests, rich foliage, beautiful flowers and durable roots that mature quickly. Garden plants need treatment only once every two weeks, and trees thrive from monthly applications.

    Grow & Gain all-purpose liquid fertilizer is available at popular retail stores like Home Depot and Costco. You can also purchase this beneficial all-purpose liquid fertilizer now from the convenient online shopping cart.

  • Desert Gardening with Bougainvillea

    [cmsms_row][cmsms_column data_width=”1/1″][cmsms_text]

    When recollecting a favored tropical vacation destination, images of sandy beaches, swaying palm tress and brightly colored blooms of paradise come to mind. The bougainvillea creates the boldest visual impact, with its vines twisting and climbing to display a cascade of showy blossoms. This drought tolerant ornamental makes for an excellent tropical or desert garden plant.

    These perennial vines are the answer for those who crave tropical scenery in arid environments. Grown in hardiness zones 7-10, these plants thrive best in the full sun of hot and dry climates, making them an ideal choice for a xeriscape. The plant is also tolerant to salt, making it the perfect candidate for gardens in coastal regions. The thorny wood stems bear heart-shaped leaves that may be solid green or variegated, and clusters of bracts in purple, orange, pink, burgundy or white. The plants are referred to as twining vines, indicating their growth pattern as that of winding their stems around nearby trellises and stakes for support.

    In regions where daytime temperatures can soar over 100 degrees, desert gardening becomes a popular and environmentally friendly option. Also known as xeriscaping, this method of landscaping is designed with heat and drought tolerances in mind. Plants that are indigenous to the local climate are implemented into the desert garden plan. Techniques such as hydro zoning, drip irrigation and moisture retention in the soil are all employed to maximize water efficiency. Advantages of such desert gardening projects include lower water bills, reduced water waste, reduction in mowing and less garden maintenance. Less time spent working in the garden yields the pleasure of more time spent enjoying the scenic vista. Nature enthusiasts will revel in the prospect that these desert gardens offer habitats for native butterflies and birds.

    The versatile bougainvillea plant may also be grown in containers. Balcony or porch railings are embellished with these blooms as they cascade from hanging baskets. Potted bougainvillea bonsai varieties provide an adorning option for the smaller space of an apartment terrace.

    For those living in the cooler Zones 7 and 8, a boost of tropical bougainvillea color can still be infused into outdoor decor. In such environs, bougainvillea plants must be be grown in containers; their blooms offering a stunning seasonal display to embellish sun-drenched decks and patios. Bougainvillea plants must be brought indoors before the first frost and kept in a cool, lowly lit area, such as a basement, during the winter months.

    For a comprehensive source of information regarding bougainvillea selection, planting and care of these glorious blooming vines, visit our main bougainvillea page. The bougainvillea experts of BGI are ready to help you transform your sunny spot into a welcoming, color-splashed desert garden paradise.

    [/cmsms_text][/cmsms_column][/cmsms_row]

  • Propagation of Bougainvillea

    [cmsms_row][cmsms_column data_width=”1/1″][cmsms_text]

    The Bougainvillea is a type of plant that is originally found in South America. The region this plant is found in stretches from parts of Brazil to Peru and to the south of Argentina. There are between 4 to 10 different species of the Bougainvillea. The plant was first discovered by Europeans in the late 1700s and has become a bit of a fascination since then. People are always trying to see how they can succeed with bougainvillea plant propagation. If you are serious about learning about how to propagate bougainvillea, then you need to learn a bit more about the plant itself.

    The plant is quite thorny and can be as little as 1 meter in height or 10 meters, depending on how it grows and where it grows. It is a very spiky plant and it actually has an odd black goo that is inside its thorns. When there is a lot of rain the bougainvillea can be quite green but if there is little rain, then they become quite bare. The plant has a very tiny white flower that is about 10 cm long and 5 cm in breadth. The base color is white with tiny clusters surrounding it in colors of pink, purple, red, orange, or even yellow.

    The Bougainvillea plant is always in danger of having worms or snails around it as they use the plant as food. Countries such as Pakistan, India, China, Taiwan, Vietnam, and parts of Europe are perfect areas for bougainvillea propagation. Even warmer parts of the United States have been known for their bougainvillea propagation.

    A lot of the bougainvillea that you see today is actually the byproduct of breeding done with various species of the plant. Three of these species are regularly brought together for breeding. These are hybrid bougainvillea and it can be hard to tell where they came from originally.

    If you are wondering about how bougainvillea can be propagated, then you should know that they require dry, fertile soil. They can grow very quickly or very slowly, depending on what type of bougainvillea the plant is. You need to expose the plant to a lot of sunlight if you want it to grow properly. It also requires plenty of fertilization. Only when the plant has fully formed does it not need as much water as before. Do not over water the plant once it has formed, as it will cause the leaves to wilt away or the whole plant may die from decay. These are the important things you need to know while propagating bougainvillea.

    [/cmsms_text][/cmsms_column][/cmsms_row]