Author: BGI Fertilizers

  • Hibiscus Fertilizer

    Hibiscus FertilizerHibiscus plants are native to tropical climates and will thrive in hot and humid conditions year round. However, many plant enthusiasts have successfully grown the hardy hibiscus varieties in colder zones of the country as well. It may be difficult for amateur gardeners to distinct which type of hibiscus tree they own. The easiest way is to observe the hibiscus flower. This plant will produce enormously large flowers with multiple colors in tropical varieties, and smaller blossoms with one color in hardy climates. These plants will have to be stored inside during the winter in cooler weather zones. However, the perennial hibiscus can be cultivated in any climate with appropriate care.

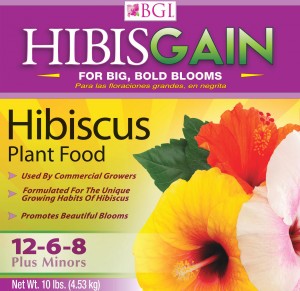
    Very effective drainage will become a major part of your regular hibiscus care. Special mixes of perlite, peat moss, bark and soil are available at many garden centers.  The use of ordinary garden soil is not recommended. You must pay close attention to the ingredients listed on hibiscus fertilizer labels. Hibiscus fertilization is suggested in frequent small doses. Heavy fertilization will destroy the roots of the plant and ultimately diminish the chances of the plant’s survival. The most effective fertilizing product currently on the market is HibisGain. The same principles apply when using this type of plant nourishment. Small dosages will ensure continuous growth and annual existence. Great care must be implemented with the application of HibisGain. The granules should be spread evenly around the plant without leaving any of the fertilizer remaining on the leaves or the blossoms. This method will prevent any injury to the delicate structure of the plant. The soil immediately surrounding the hibiscus plant should be soaked with water before any application. Supplemental fertilizing products can be used along with the HibisGain to guarantee successful results. Presently, this new product is sold within the United States only and any international orders cannot be accepted.

  • Hardiness Zone Search

    Hardiness Zone Search

    [cmsms_row][cmsms_column data_width=”1/1″][cmsms_text]

    Bougainvillea thrive in Hardiness Zone 9 and up. In areas where temperatures fall below 30° F. bougainvillea are treated as annuals, and brought indoors to winter-over. Visit our Bougainvillea 101 page for tips on how to “winter-over” your bougainvillea.

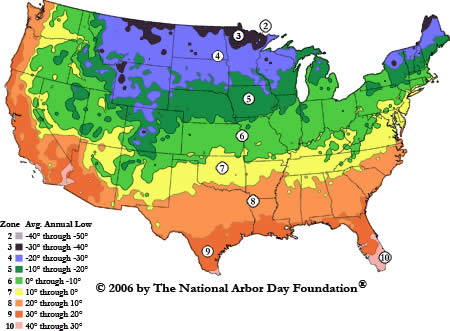
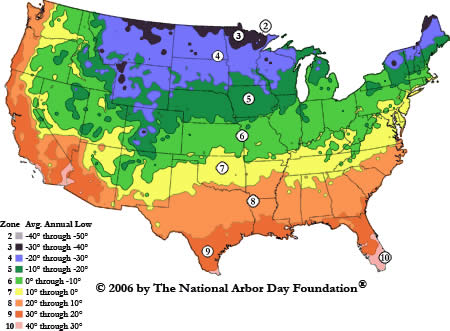
    Look up hardiness zones in your area. Enter your zip code in the form below, and we’ll tell you where you fall in the Arborday.org Hardiness Zones Database.

    What are Hardiness Zones?

    Hardiness Zone Map

    The Plant Hardiness Zones divide the United States and Canada into 11 areas based on a 10 degree Fahrenheit difference in the average annual minimum temperature. (The United States falls within Zones 2 through 10). For example, the lowest average temperature in Zone 2 is -50 to -40 degrees Fahrenheit, while the minimum average temperature in zone 10 is +30 to +40 degrees Fahrenheit.

    Suggested hardiness zones have been indicated for all trees and perennials available online from the Arbor Day Foundation. If a range of zones, for example, zones 4-9, is indicated, the tree or perennial is known to be hardy in zones 4, 5, 6, 7, 8, and 9.

    Suitable hardiness means a plant can be expected to grow in the zone’s temperature extremes, as determined by the lowest average annual temperature. Keep in mind that local variations such as moisture, soil, winds, and other conditions might affect the viability of individual plants.

    [/cmsms_text][/cmsms_column][/cmsms_row]

  • Xeriscaping

    Xeriscaping

    [cmsms_row][cmsms_column data_width=”1/1″][cmsms_text]

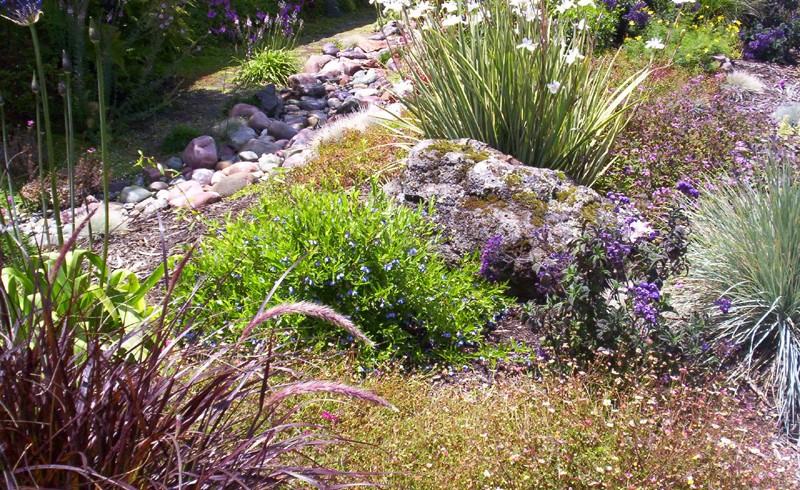
    Xeriscaping refers to landscaping in ways that do not require supplemental irrigation. It is promoted in areas that do not have easily accessible supplies of fresh water. The word Xeriscaping [zeer-i-skey-ping,] was coined by combining xeros (Greek for “dry”) with landscape.  Plants whose natural requirements are appropriate to the local climate are emphasized, and care is taken to avoid losing water to evaporation and run-off.

    Xeriscaped landscaping in Florida or in any other state does not mean tearing out the lawn and putting in rocks and desert plants such as cacti, euphorbia and agaves. Rather, properly approached, a xeriscaped landscape will allow you to use a wide variety of plants, but insists on common-sense measures that will help to conserve water, such as grouping plants with similar water requirements together, reducing the use of lawn grass, and using indigenous plants (plants which are adapted to the local climate and require less water than exotics usually do). Plants most suited to xeriscaped landscaping, such as Bougainvillea, are sometimes referred to as “xeric” plants.

    Implementation

    Implementation of xeriscaping includes: 

    Appropriate choice and arrangement of a plant (or plants) – where possible, plants that are native to the area or to similar climates, as well as other plants that tolerate or avoid water stress (xerophytes, halophytes, summer-dormant bulbs, very deeply rooted plants) as ornamentals.

    Hydrozoning, grouping plants with similar watering requirements together is quite necessary. Plants that require more water (for example, vegetables, fruits, and certain flowers) are grouped together. These less water-efficient plants may also be sheltered from the wind and/or sun by planting them in the shade (under trees, beside a house etc.) to decrease the amount of water they need.

    Minimal turf areas, using drought-tolerant turf-grass species where turf is needed at all (children’s play areas). The landscape can be filled in with borders and islands of more water-efficient ornamental plants.

    Efficient application of water – drip irrigation where possible. Overhead irrigation (where needed) is applied in the morning or evening, when it is less likely to be blown away by wind or lost by evaporation. Drought-tolerant plants get no more water than they need to look good, and of course water is not allowed to splash onto concrete walkways or other areas where it is not needed.

    Conservation of water in the soil. Soil with improved structure retains water better, and mulch cools the soil surface and hinders evaporation.

    Advantages

    • lower water bills
    • more water available for other uses and other people (such as showers, sinks, hoses)
    • less time and work needed for maintenance, making gardening more simple and stress-free
    • little or no lawn mowing (which saves gas)
    • xeriscape plants along with proper bed design tends to take full advantage of rainfall
    • when water restrictions are implemented, xeriscape plants will tend to survive, while more traditional plants may not
    • increased habitat for native bees, butterflies, and other fauna

    Disadvantages

    • requires planning, especially if color is desired throughout the season, as most perennials do not bloom continuously
    • may require more start-up work to prepare beds for planting than simply laying sod
    • some homeowners’ associations may object to non-traditional plants. However, some states, such as Florida, include law, as it pertains to Homeowner’s Associations, that make it unlawful to include a clause prohibiting “property owner from implementing Xeriscape or Florida-friendly landscape, as defined in s. 373.185(1), on his or her land.” in Homeowner Association documents, (Ref: 720.3075.4 Prohibited clauses in association documents)
    • requires that people moving from water-abundant to water-scarce areas change their mind set as to what types of plants they are able to practically and economically maintain
    • may have to substitute one type of plant for another
    • xeriscape beds require periodic maintenance which is more involved than simply mowing and edging, especially to maintain color. Weeds and trash may also be more of a problem than in a traditional lawn.
    • more complicated irrigation systems may be required.
    • xeriscape plants can waste water if irrigation is not properly managed.

    “Florida Favorites”

    Some people think of a desert scene when they hear “Xeriscape,” but this is not the look of a typical Xeriscape. Some of the “Florida Favorites” you can use for your Xeriscape landscape are listed here, courtesy of the South Florida Water Management District.  Several of them are lush and tropical-looking like the bougainvillea, and will add to the beauty of your landscape while conserving water.

    Consult your nursery professional for information on which of these plants are appropriate for your region.

    Trees

    • Bald cypress (Taxodium distichum)
    • Dahoon holly (Ilex cassine)
    • Geiger tree (Cordia sebestena)
    • Gumbo Limbo (Bursera simaruba)
    • Ironwood (Krugiodendron ferreum)
    • Live oak (Quercus virginiana)
    • Magnolia, southern (Magnolia grandiflora)
    • Magnolia, sweet bay (Magnolia virginiana)
    • Myrsine (Rapanea guianensis)
    • Paradise tree (Simarouba glauca)
    • Pigeon plum (Coccoloba diversifolia)
    • Red bay (Persea borbonia)
    • Red maple (Acer rubrum)
    • Sea grape (Coccoloba uvifera)
    • Silver buttonwood (Conocarpus erectus var. sericeus)
    • Simpson’s stopper (Myricanthes fragrans)
    • Slash pine (Pinus elliottii)
    • Southern red cedar (Juniperus silicicola)
    • Trumpet tree (Tabebuia spp.)

    Shrubs

    • Beautyberry (Callicarpa americana)
    • Cocoplum (Chrysobalanus icaco)
    • Coral bean (Erythrina herbacea)
    • Crinum lily (Crinum asiaticum)
    • Firebush (Hamelia patens)
    • Florida privet (Forestiera segregata)
    • Holly, Stokes dwarf (Ilex vomitoria)
    • Jamaica caper (Capparis cyanophallophora)
    • Marlberry (Ardisia escallonioides)
    • Necklace pod (Sophora tomentosa)
    • Walter’s viburnum (Viburnum obovatum)
    • Wax myrtle (Myrica cerifera)
    • White indigo berry(Randia aculeata)
    • White stopper (Eugenia axillaris)
    • Wild coffee (Psychotria nervosa)
    • Wild coffee, dwarf (Psychotria ligustrifolia)

    Palms and Cycads

    • Buccaneer or Sargent’s palm (Pseudophoenix sargentii)
    • Cabbage palm (Sabal palmetto)
    • Coontie (Zamia pumila)
    • Paurotis/Everglades palm (Acoelorrhaphe wrightii)
    • Queen sago (Cycas circinalis)
    • Royal palm (Roystonea elata)
    • Saw palmetto (Serenoa repens)
    • Thatch palm (Thrinax spp.)

    Ferns

    • Boston fern (Nephrolepis exaltata)
    • Leather fern (Acrostichum danaeifolium)
    • Swamp fern (Blechnum serrulatum)

    Accent Grasses, Vines and Groundcovers

    • Bougainvillea (Bougainvillea spp.)
    • Coral honeysuckle (Lonicera sempervirens)
    • Cordgrass (Spartina bakeri)
    • Corky-stemmed passion-flower (Passiflora suberosa)
    • Fakahatchee grass (Tripsacum dactyloides)
    • Florida gama grass (Tripsacum floridanum)
    • Lantana, trailing (Lantana montevidensis)
    • Liriope (Liriope muscari)
    • Mondo grass (Ophiopogon japonicus)
    • Purple love grass (Eragrostis spectabilis)
    • Railroad vine (Ipomoea pes-caprae)
    • Sea oats (Uniola paniculata)

    Annuals/Perennials/Wildflowers

    • Beach sunflower (Helianthus debilis)
    • Black-eyed Susan (Rudbeckia hirta)
    • Blanket flower (Gaillardia pulchella)
    • Lantana, pineland (Lantana depressa)
    • Lantana, wild (Lantana involucrata)
    • Pentas (Pentas lanceolata)
    • Porter weed (Stachytarpheta jamaicensis)
    • Sea oxeye daisy (Borrichia frutescens)
    • Spider lily (Hymenocallis latifolia)
    • Tickseed (Coreopsis leavenworthii)

    Xeriscape and save time, money, water, and our environment!  For more information, go to sfwmd.gov.

    [/cmsms_text][/cmsms_column][/cmsms_row]

  • Bougainvillea Pests & Diseases

    Bougainvillea Pests & Diseases

    [cmsms_row][cmsms_column data_width=”1/1″][cmsms_text]

    A part of the bougainvillea’s appeal is that they are relatively disease and pest-free plants. It is NOT common for your bougainvillea to be affected by these pests and diseases if you follow BGI’s Rules for Care, and fertilize with Bougain® which contain a significant amount of micronutrients – vital for healthy, blooming bougainvillea. This page contains most (but not all) common pests/diseases that may affect your bougainvillea.

    On the rare occurrences that your bougainvillea experiences pest problems or disease, always try the least toxic method of pest control as your first step. If you use chemical pesticides to control insect pests, you will also kill natural predators. If you choose a chemical control, follow directions and guidelines closely and always wear protective clothing and safety gear including a long-sleeved shirt, long pants, neoprene gloves, goggles and a respirator. Chemical pesticides are not recommended for use inside the home.

    Aphids

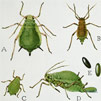
    Known also as greenfly, blackfly or plant lice, aphids are minute plant-feeding insects. Important natural enemies include the predatory ladybugs/ladybirds/ladybeetles, and lacewings. Aphids are tiny, pear-shaped, sap-sucking pests, appearing in the spring to feast on your plants’ tender new leaves. They leave behind a secretion that attracts ants and promotes mold growth. Not to fear; you don’t have to resort to toxic chemicals to save your bougainvillea.

    Natural Control

    1. Examine your garden regularly for signs of aphids. Look for clusters of the little bugs on new growth as well as on the curled and twisted leaves.
    2. While wearing gloves, remove the aphids by hand, or use a sharp stream of water to knock them off the plant.
    3. Cut away and dispose of infested foliage.
    4. Capture flying aphids by placing yellow sticky traps near infected plants.
    5. Make a nontoxic pesticide by mixing 1 cup vegetable oil with 1 tablespoon liquid dish-washing soap. Add 1½ teaspoon solution per cup of warm water to a handheld spray bottle.
    6. Hit the aphids directly with above mixture and spray entire plant thoroughly.
    7. Introduce beneficial insects, such as ladybugs/ladybirds/ladybeetles, or green lacewings to your garden to feed on the aphids. Both can be bought from garden stores or online.
    8. Avoid planting bougainvillea near aphid-attracting plants, such as birch trees, and instead grow plants such as white sweet clover, spearmint, sweet fennel and Queen Anne’s lace, which attract and house the lacewings, ladybugs and other insects that feed on aphids.
    9. Rid your garden of ants. Ants love to eat the sugary sap (honeydew) secreted by aphids, and will “farm” the aphids, protecting them on the plant they eat.

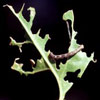
    Caterpillars; namely the Bougainvillea Looper Caterpillar

    The bougainvillea looper is a green or brown caterpillar about 1 inch long. It is also called inchworm or measuring worm. The looper larva mimics stems and branches very well and feeds primarily at night, which is why you may see the damage but fail to find the culprit on the plant. The adult is a moth, a very fast flyer with a wingspan of about 1 inch. The moth does not feed on the foliage. Like the larva, it also is active at night, when it is believed to lay its eggs on the underside of bougainvillea leaves. Go out scouting very early in the morning or at night if you have a good strong flashlight. The bougainvillea looper feeds from the edges of the leaves, which results in severe scalloping of the foliage. Attacks begin on the young tender shoots and leaves before progressing down the stem. The insect will cause significant visual damage to bougainvillea, although this does not apparently result in the death of the plants.

    Chemical Control

    Bacillus thuringiensis (BT, or Dipel®) and neem-based biological insecticide products should are a good solution and should be effective on the loopers without harming other insects that may biologically control them. Insectical oils and soaps will not control caterpillars such as the looper. Most synthetic insecticides with labels permitting use against caterpillars on landscape ornamentals, such as carbaryl (Sevin®), will likely kill the bougainvillea looper, although these products are often destructive to beneficial insects as well. Spraying insecticides late in the evening is recommended. This is when the bougainvillea looper caterpillars and adult moths are active, and also when the beneficial insects are not likely to be active.

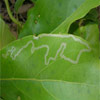
    Leafminers: Moths, Flies, Beetles, Wasps

    The vast majority of leaf-mining insects are moths (Lepidoptera) and flies (Diptera), though some beetles and wasps also exhibit this behavior. Although the types of insects differ, the damage they cause is very similar. Because of this, the larval stages of all insects which leaf mine are collectively and generically called “leaf miners”. All leaf miners will cause the leaves to look skeletonized, and to fall from the plant. Eventually they can kill the plant.

    Natural Control

    Cleaning around the plant is your best solution. Like wood borers, leaf miners are difficult to control as they are protected from insecticide sprays and plant defenses by feeding within the tissues of the leaves themselves. Some leaf miners can be killed by systemic pesticides (a type of pesticide that moves inside a plant following absorption by the plant), but many breeds are still immune to the effects of pesticide.

    1. Cleaning around the plants. Debris tends to collect at the base of plants, and this is where the adults of the leaf miner larvae lay their eggs. Some leaf mining larva may also “winter over” in this debris. Removing leaves and other debris from around plants is an excellent method for controlling them.
    2. Weeding provides an alternate food source for leaf miners, so areas around plants should be weeded and mulched.
    3. Do not use contact pesticides. Since the leaf miner is inside the leaf, contact poisons cannot reach it, and therefore cannot kill it. Additionally, leaf mining insect larvae quickly become resistant to contact pesticides.

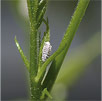
    Scale Insects: Parasites, Mealybugs

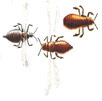
    Most scale insects are parasites of plants, feeding on sap drawn directly from the plant’s vascular system. Scale insects vary dramatically in their appearance from very small organisms (1-2 mm) that occur under wax covers (some look like oyster shells), to shiny pearl-like objects (about 5 mm), to creatures covered with mealy wax. Scale insects’ waxy covering makes them quite resistant to pesticides, which are only effective against the juvenile crawler stage. Over time, scales and mealybugs turn leaves black with “sooty mold”.

    Natural Control

    1. Identify scale insects by looking on the undersides of leaves and around leaf joints. Scale-damaged plants look withered and sickly and may have sticky sap or a black fungus on the leaves and stems.
    2. Move an infested plant to isolate it from the rest of your collection. Scale insects are invasive and will infest other plants.
    3. Remove scale insects with a twig or scraping tool. They will scrape off of plant tissue easily.
    4. Wash infested plants with a soap/oil mixture if scraping alone doesn’t do the job. Mix ½ tsp. insecticidal soap, ¼ tsp. horticultural oil into 1 quart of warm water. Wash the leaves individually with the soap/oil mixture. Rinse well. There are also numerous chemical products available for the control of mealybugs.
    5. Purchase and release a natural predator called Chilocorus nigritus or Lindorus lophanthae for serious infestations. Place the insects directly on the infested plant. Once they have consumed the scale, the predators will simply die from lack of food in the indoor environment.
    6. Spray with pyrethrin as a last resort. Pyrethrin is an organic pesticide made from chrysanthemums.
    7. Be diligent – examine infested plants for evidence of new scale every day. It may take some time, but your bougainvillea will thank you!

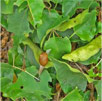
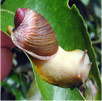
    Snails & Slugs

    Photo Credit: Weidners’ Gardens. Encinitas, California, Jeffrey Lotz; FDACS-DPI and David Robinson.

    Snails usually eat from the middle of the leaf, but they can take bites out the edges as well. All this biting and chomping will make the leaf look scalloped. Putting down barriers that slugs can’t cross is, perhaps, the best way to protect your garden from these common pests. Keep them from entering and you won’t have to use pesticides.

    Natural Control

    1. Water your garden only in the early morning, or use an underground irrigation pipe. This will keep the top of the soil dry and uninviting to slugs and snails.
    2. Spread dry soot, dry ashes, dry lime, sharp cinders and dry chalk around plants or beds. Any one of these or several in combination should do the trick.
    3. Rough, sharp sand is another option. Use it the same way as the materials in Step 2.
    4. Try calcified seaweed or crushed eggshells as a barrier.
    5. Another barrier material is clippings from thorny roses or holly leaves. Rosa rugosa (Japanese rose) clippings are good.
    6. Spread pine needles in your garden (these are also good mulch for strawberries).
    7. Spread chopped hair (human hair is fine) in your garden.
    8. Try using oak leaves as a barrier. Slugs and snails don’t like the tannin in the leaves.

    Chemical Control
    Any brand of slug/snail killer will do the job. Sluggo is good because it can be used around pets and people.

    Mites; namely Spider Mites
    The webspinning two-spotted spider mite occasionally makes their home on bougainvillea. To the naked eye, spider mites look like tiny moving dots. Adult females, the largest forms, are less than 1/20 inch long. Spider mites live in colonies, mostly on the under-surfaces of leaves. The names “spider mite” and “webspinning mite” come from the silk webbing most species produce on infested leaves. The presence of webbing is an easy way to distinguish them from all other types of mites. Mites cause damage by sucking cell contents from leaves. A small number of mites is not usually reason for concern, but very high populations—levels high enough to show visible damage to leaves—can be damaging to plants. At first, the damage shows up as a stippling of light dots on the leaves; sometimes the leaves take on a bronze color. As feeding continues, the leaves turn yellow and drop off. Often leaves, twigs, and fruit are covered with large amounts of webbing. Damage is usually worse when compounded by water stress. Check the undersides of leaves for mites, their eggs, and webbing; you will need a hand lens to identify them. To observe them more closely, shake a few off the leaf surface onto a white sheet of paper. Once disturbed, they will move around rapidly. Be sure mites are present before you treat. Sometimes the mites will be gone by the time you notice the damage; plants will often recover after mites have left.

    Natural Control
    If a treatment for mites is necessary, use selective materials, preferably insecticidal soap or insecticidal oil. Petroleum-based horticultural oils or neem oils are both acceptable. Oils and soaps must contact mites to kill them so excellent coverage, especially on the undersides of leaves, is essential and repeat applications may be required. Mid-season washing with water to remove dust may help prevent serious late-season mite infestations. Regular, forceful spraying of plants with water will often reduce spider mite numbers adequately. Be sure to get good coverage, especially on the undersides of leaves.

    Chemical Contol
    Spider mites frequently become a problem after the application of insecticides. Such outbreaks are commonly a result of the insecticide killing off the natural enemies of the mites, but also occur when certain insecticides stimulate mite reproduction. Naturally controlling mites is the best method.

    Thrips

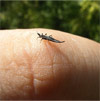
    Thrips are tiny, slender insects with fringed wings that cause discoloration and deformities on bougainvillea and other plants. Other common names for thrips include thunderflies, thunderbugs, storm flies and corn lice. Thrips are generally tiny (1 mm long or less) and are not good flyers, although they can be carried long distances by the wind. Thrips feed by piercing plant cells with their paired maxillary stylets, which form a feeding tube. Due to their small size, cryptophilic behavior, and high rate of reproduction, thrips are difficult to control using classical biological control. Only two families of parasitoid hymenoptera are known to hunt them, the Eulophidae and the Trichogrammatidae.

    Whitefly

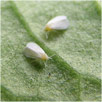
    Whiteflies typically feed on the underside of plant leaves. Whiteflies feed by tapping into the phloem of plants, exposing plants to the whiteflies’ toxic saliva and decreasing the plant’s overall turgor pressure. The damage is quickly elevated as whiteflies congregate in large numbers, quickly overwhelming susceptible plants. Damage is further exacerbated as whiteflies, like aphids, excrete honeydew as a waste product, which promotes mold growth. Whitefly control is difficult and complex, as they rapidly gain resistance to chemical pesticides. A major problem is the fact that the whiteflies and the viruses they carry can infect many different host plants. Use of yellow sticky traps to monitor infestations and only selective use of insecticides is advised.

    Common Diseases & Problems

    Fungal and Bacterial Leaf Spot (Pseudomonas and ropogonis)

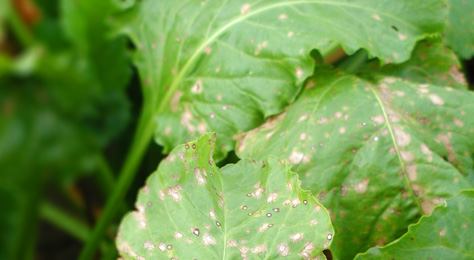
    The early symptoms are small reddish-brown leaf spots which usually occur on younger foliage, and cause the leaves to look “rusty”. These enlarge into circular or irregular dark necrotic spots. When environmental conditions are drier and less favorable, leaf spots are slower to develop. Lesions have a tan center surrounded by a dark redbrown margin, and are sometimes bordered by a chlorotic halo. In time, leaf edges may become ragged as the necrotic tissue turns dry and papery. Under conditions of high rainfall or relative humidity the lesions develop quickly and are often black and vein delimited.
    Infection of developing leaves and bracts results in puckered, distorted growth.

    Defoliation will occur when leaf spotting, blighting or marginal necrosis becomes severe.

    Natural Control
    Maintaining dry foliage is the primary control measure. Prune branches back and away from each other or, if just starting to grow, allow a large amount of space between them. Branches that are overlapping can’t dry quickly and become more susceptible to leaf spot disease. Remove infected leaves and/or plants from the growing area.
    Dispose of them immediately to reduce the spreading of infection.

    Chemical Control
    Spray fungicide in the spring if necessary. It will not cure infection that is already there, but it can control the spread of it. In frost-free climates where bougainvillea is perennial, disease incidence drops during cool and/or dry weather.

    Black, Sooty Mold

    See “Aphids”, “Scale Insects: Parasites, Mealybugs”, and “Whiteflies”

    Leaf drop

    Problem as a result of over-watering, under-watering, low light levels, or cold temperatures.

    Leaf spots

    Yellow or tan spots appear on older leaves may be sign of Magnesium deficiency (common with yellow bougainvillea varieties), or from over-watering.

    Root rot

    Plants that are over-watered or subjected to water logged conditions can develop root or stem rot. It’s easily prevented by careful handling and by the application of a broad spectrum fungicide drench during transplanting or planting in the landscape.

    Scalloped Leaves a.k.a. “Help, Something’s Eating My Bougainvillea!”

    See “Snails & Slugs” and “Bougainvillea Looper Caterpillar”

    Yellowing or chlorosis on new growth

    Often a result of a magnesium or iron deficiency, and an application of a complete micronutrient blend should help, but use caution–too much of either Mn or Fe will result in a secondary deficiency, as the plant is unable to absorb one when the other is present at high levels.

    Yellowing or chlorosis on old growth

    Often a result of a magnesium or iron deficiency. Apply Epsom salts at 1-2 tsp/gal as a drench or foliar spray.

    Deficiency signs

    [wwcAmzAffProducts asin=”B00CQ5GH1S”][/wwcAmzAffProducts]

    Nitrogen deficiency: Older leaves turn a pale green and the veins are usually a reddish color. New growth will be stunted.

    Phosphorus deficiency: The veins will turn red to purple and the plant as a whole will look purplish.

    Potassium deficiency: Causes the edges of older the leaves to be a purple color and the leaf tips will be a brownish color.

    Magnesium deficiency: First appears on older leaves where they turn a spotted yellow or tan color.

    Zinc deficiency (rare): Will look almost like magnesium but here the leaf will be twisted.

    Iron deficiency: Young growth is stunted and pale — you’ll know its iron if the veins on the leaf remain green.

    Calcium deficiency: Dead areas appear in young growth and the tips soon die.

    [/cmsms_text][/cmsms_column][/cmsms_row]
  • Bougainvillea Care Tips

    Bougainvillea Care Tips

    [cmsms_row data_width=”boxed” data_padding_left=”3″ data_padding_right=”3″ data_color=”default” data_bg_color=”#ffffff” data_bg_position=”top center” data_bg_repeat=”no-repeat” data_bg_attachment=”scroll” data_bg_size=”cover” data_bg_parallax_ratio=”0.5″ data_color_overlay=”#000000″ data_overlay_opacity=”50″ data_padding_top=”0″ data_padding_bottom=”50″][cmsms_column data_width=”1/1″][cmsms_heading type=”h1″ font_weight=”400″ font_style=”normal” text_align=”default” target=”self” margin_top=”0″ margin_bottom=”20″ animation_delay=”0″]Light & Temperature[/cmsms_heading][cmsms_text animation_delay=”0″]Bougainvillea are tropical plants that thrive in areas outdoors with low rainfall and intense heat. For maximum blooming, they need direct sunlight for at least 5 hours per day. For best results, night temperatures should stay above 60°F (15°C) while daytime temperatures can exceed 100°F (38°C) without ill effect. Bougainvillea thrives in Hardiness Zones 9 and up, but can be enjoyed seasonally in other zones as long as they are protected and brought indoors during winter months. When treated as annuals, bougainvillea can be wintered over in basements or other cool and lower light areas.[/cmsms_text][cmsms_divider type=”dotted” margin_top=”5″ margin_bottom=”5″ animation_delay=”0″][cmsms_heading type=”h1″ font_weight=”400″ font_style=”normal” text_align=”default” target=”self” margin_top=”0″ margin_bottom=”20″ animation_delay=”0″]Feeding[/cmsms_heading][cmsms_image align=”left” link=”https://www.bgi-usa.com/wp-content/uploads/BOUGAIN-2lb-Bag-Bougainvillea-Fertilizer-Bougainvillea-Plant-Food-0-e1470149674875.jpg” animation_delay=”0″]3387|https://www.bgi-usa.com/wp-content/uploads/BOUGAIN-2lb-Bag-Bougainvillea-Fertilizer-Bougainvillea-Plant-Food-0-e1470149674875.jpg|full[/cmsms_image][cmsms_text animation_delay=”0″]The Achilles heel of bougainvillea has always been their delicate and thin root system. Use a fertilizer high in micronutrients, especially Iron, to promote spectacular blooming and healthy root development such as Bougain®. Bougain® contains 5% Iron and other micronutrients to strengthen delicate roots and intensify color of bracts and foliage. Bougainvillea are heavy feeders that crave minors during flowering season, so remember to regularly feed your plant during these months. Reduce the frequency to half during non-coloring months, especially under cool temperatures.[/cmsms_text][cmsms_divider type=”dotted” margin_top=”5″ margin_bottom=”5″ animation_delay=”0″][cmsms_heading type=”h1″ font_weight=”400″ font_style=”normal” text_align=”default” target=”self” margin_top=”0″ margin_bottom=”20″ animation_delay=”0″]Watering[/cmsms_heading][cmsms_text animation_delay=”0″]The amount of watering needed is directly related to the climate, soil type, plant size and weather conditions. However, there are some guidelines you can use. Bougainvillea are drought-tolerant plants, and require very little water once established. Bring the soil to visual dryness between waterings. Wilting is the best indicator that watering is needed. Take care not to let your bougainvillea get bone-dry, as this will cause bracts and foliage to drop. When it is time to water, do it thoroughly – making sure that every inch of root gets watered. When choosing an area to plant your bougainvillea, remember that higher ground is best – as this makes water drain AWAY from the roots. Avoid constant, light, and frequent watering as this will promote a weak and shallow root system and prevent any major coloring on your bougainvillea. Be careful not to allow your bougainvillea to sit in water as this may cause bracts to drop or stop blooming altogether. If your bougainvillea is grown in a pot – make sure drainage holes are unobstructed, and toss that water dish… bougainvillea do not like wet feet![/cmsms_text][cmsms_divider type=”dotted” margin_top=”5″ margin_bottom=”5″ animation_delay=”0″][cmsms_heading type=”h1″ font_weight=”400″ font_style=”normal” text_align=”default” target=”self” margin_top=”0″ margin_bottom=”20″ animation_delay=”0″]Pruning & Pinching[/cmsms_heading][cmsms_gallery layout=”gallery” image_size_gallery=”square-thumb” gallery_columns=”4″ gallery_links=”lightbox” animation_delay=”0″]563|https://www.bgi-usa.com/wp-content/uploads/2012/01/Pinch_Identify-New-Shoots-BGI-150×150.jpg,565|https://www.bgi-usa.com/wp-content/uploads/2012/01/Pinch_Step-1-BGI-150×150.jpg,566|https://www.bgi-usa.com/wp-content/uploads/2012/01/Pinch_Step-2-BGI-150×150.jpg,564|https://www.bgi-usa.com/wp-content/uploads/2012/01/Pinch_Pinched-Bougainvillea-Shoot-BGI-150×150.jpg,567|https://www.bgi-usa.com/wp-content/uploads/2012/01/Prune_Step-1-BGI-150×150.jpg,568|https://www.bgi-usa.com/wp-content/uploads/2012/01/Prune_Step-2-BGI-150×150.jpg,569|https://www.bgi-usa.com/wp-content/uploads/2012/01/Trimming_Step-1-BGI-150×150.jpg,570|https://www.bgi-usa.com/wp-content/uploads/2012/01/Trimming_Step-2-BGI-150×150.jpg[/cmsms_gallery][cmsms_text animation_delay=”0″]

    Pruning and pinching bougainvillea are important techniques to promote the greatest growth and flowering – as bougainvillea only bloom on new growth. Pruning is important not only for shape but for strength as well since bougainvillea tend to grow outward without creating branches unless their stems are pruned. They can be pruned hard if growth is excessive.

    In Florida, landscape professionals commonly perform a hard cut at the first sign of summer, and keep on a regular trimming schedule all summer long to maintain size. Pinching is the method of removing the soft tips of young plant stems to encourage fuller growth. You can do this with a pair of secateurs, or by using your fingers to pinch off ½ inch from the tip of new soft growth. Bougainvillea will send out several new stems just below the pinched tip.

    The more regularly you pinch, the more your bougainvillea will branch and bloom. The best time to prune or pinch is after the flush of color or flowering cycle is completed. Flowering cycles are typically four to six weeks.

    [/cmsms_text][cmsms_divider type=”dotted” margin_top=”5″ margin_bottom=”5″ animation_delay=”0″][cmsms_heading type=”h1″ font_weight=”400″ font_style=”normal” text_align=”default” target=”self” margin_top=”0″ margin_bottom=”20″ animation_delay=”0″]Soil[/cmsms_heading][cmsms_text animation_delay=”0″]

    Bougainvillea grow best in well-drained loamy soil (made up of equal parts sand, silt, and clay), mixed with organic matter which allow nutrients and oxygen to more easily reach the roots. Use a soil mix described as “quick draining” such as BGI Select Soil™ for best results. Do not use any kind of water-retaining soil as this may cause root rot and leaf spots to appear.

    *This document is copyrighted and cannot be used without expressed and written permission by Bougainvillea Growers International.

    [/cmsms_text][/cmsms_column][/cmsms_row]

  • PARK(ing) Day 2009

    PARK(ing) Day

    On September 18, 2009, artists, activists and citizens from cities around the globe will temporarily transform metered parking spaces into public parks and other social spaces, as part of an annual event called “PARK(ing) Day”. Perhaps you’ve already heard of it, or participate in this global event.  I just recently heard about it from Steven Davis, ASLA, a landscape architect from Fruit Cove, Florida, and thought it was a really neat idea!  He’ll be setting up this week at the corner of Ocean Street at Bay Street in downtown Jacksonville.  We were happy to donate our bougainvillea to this event intended to promote creativity and civic engagement.

    For more information, or to participate in next year’s event – visit  www.parkingday.org

  • Bougainvillea ‘Helen Johnson’ Makes the List

    Bougainvillea ‘Helen Johnson’ Dwarf provides a deep pink shade of the medium pink, silken blooms of the Pink Powder Puff tree (Calliandra surinamensis) in this landscape.

    Bougainvillea ‘Helen Johnson’ makes Michael Spencer’s list of the 41 structural shrubs that belong in every designer’s Plant Book. Mr. Spencer, ASLA, has been practicing landscape architecture for 25 years and is the president of MSA Design in Naples, Florida. He recently wrote an article titled, “Make it Green: ‘Structural’ Stock”, that discusses the distinction between the “structural” plants and – well, all the others.

    Mr. Spencer explains that the idea of structural plants is simple, and that “any garden or planting project requires an overall structure to carry the conceptual load”. He points out examples of structural plants sometimes being “hedges around parking lots (which are required), or a hedge down your property line to screen that nice neighbor’s purple house, or a planting in front of your air conditioner”.

    Other structural stock includes shade trees or palm groupings. Not only do they provide beneficial shade and reduction of heat load, but they also create micro-climates where shade-loving plants can thrive. Another structural element is foundation plantings, which Mr. Spencer states, “are widely understood to be planted around the building, at the foundation, as a sort of du rigour initial planting”.

    Thank you, Mr. Spencer , for promoting the use of this showy, dwarf bougainvillea as part of your Plant Book!

    You can check out the full article at
    http://www.naplesnews.com/news/2009/aug/21/make-it-green-structural-stock-build-sturdy-landsc/

  • Bougainvillea Growers International Ships Bougainvillea Without Shattering

    By PR News Wire
    Dec. 12, 2008

    The largest wholesale bougainvillea grower in the country, Bougainvillea Growers International (BGI), has discovered the secret to shipping bougainvillea by using a mix of proprietary bloom inhibitors in conjunction with a strict selection process. Located in Palm Beach County, BGI has been working for over fourteen years to address the problem of bougainvillea shattering, or dropping their colorful bracts, while in transit for days in an enclosed truck.

    “This capability to ship retail-ready bougainvillea across the continent creates incredible opportunities for everyone. It is a treat for all of us, and also really fun to change the dynamics and paradigm of an old industry,” says Tom Scannell, owner of BGI. “We don’t just grow plants – we create beauty and joy in people’s lives!”

    BGI’s shippable bougainvillea saves customers time and money because they are retail-ready as soon as they land. This eliminates weeks or even months previously needed in the Fall to re-grow new blooms in time for Spring. BGI also takes the worry out of whether they will be blooming in time for Mother’s Day. Now garden centers across the country can receive bougainvillea in full bloom and sell-out in the same week!

    Many customers have already benefited from BGI’s shippable bougainvillea. Bell Nursery, a leading wholesale production nursery, became a customer after receiving a sample order to test the color retention. “The plants sat on my porch for a week and still kept its color after shipping,” said Mike McCarthy, co-owner, Bell Nursery. Even Canada is no longer out of reach for tropical bougainvillea. BGI’s newest customer, Salisbury Greenhouse in Alberta, Canada is over 3,000 miles from Florida, and one week by truck. “Plants arrived perfect after being on a truck for seven days,” said Rob Sproule, co-owner, Salisbury Greenhouse. “BGI has a problem on their hands – fulfilling future orders.”

    Founded in 1994, BGI is the leader in wholesale bougainvillea production for the major chain “big box” stores, independently-owned garden centers, and landscape professionals. The company offers a wide range of bougainvillea products designed to bring beauty to the end consumer, including Bougain®, the only bougainvillea fertilizer on the market today. The largest online bougainvillea care resource can be found at their website www.bgi-usa.com.

    ###

  • Overwintering Tender Plants

    By Kathi LaLiberte

    Bougainvillea, jasmine, mandevilla, banana, agapanthus and taro. Nowadays, you can find most of these and many other tropical beauties at local garden centers. Gardeners in nearly every growing are enjoying the thrill of growing heat-loving plants in their gardens and on their decks or patios. What a wonderful new palette of plants to get to know and love!

    But what happens to these cold-sensitive plants when fall comes around? The easiest solution is to bid a sad adieu, let the frost claim its victims, and send the blackened plants to the compost pile. But most gardeners are too tender-hearted—and thrifty—to let a good plant go to waste. If you grew a few tropical plants in your garden this summer and want to try your hand at keeping them alive indoors until next spring, you have three options:

    Keep the plant in active growth in a warm, sunny place (like a sunroom or heated greenhouse).

    Take cuttings and allow the “mother” plant to die. Root the cuttings and pot them up so you have new plants in the spring.

    Allow the plant to go dormant and keep it in a cool, dark place until spring.

    Overwintering Techniques

    • Overwinter as houseplants: cordyline, phormium, palms, croton, bamboo, jasmine, allamanda, bougainvillea, hibiscus, citrus
    • Keep plant dormant in a cool, dark place: brugmansia, banana, dwarf canna
    • Store dormant bulbs/corms/tubers: ginger, sweet potato vine, colocasia, caladium, canna, calla

    1. Keeping Your Plants In Growth Mode

    If you have a sunny window where the air temperature stays about 60-70 degrees, you can keep most tropicals growing and possibly even blooming right through the winter. Bougainvillea, jasmine, citrus, hibiscus and geraniums are some of the plants that will be happy in this situation, as long as they get plenty of light, and nighttime temperatures don’t drop below 40 degrees. Plants that are relatively small will be happy to spend the winter under a grow light. Set a timer to ensure they get about 12 hours of light each day.

    Make sure to bring these plants into your house or sunroom before the weather turns cold and definitely before frost threatens. Expect that the plants will drop some leaves the first few months as they adjust to living indoors. Water as needed, but keep the soil on the dry side. Avoid crowding, because good air circulation will help deter pest and disease problems (try running a small oscillating fan for several hours each day). If possible, keep the humidity level between 30 and 45 percent by misting or placing a pan of water among the plants. In cold climates, keep the humidity below 30 percent to avoid condensation on your windows.

    Keep in mind that the ideal winter environment for most of these tropical plants would be approximately 50 degrees at night and 65 degrees during the day. Warmer air temperatures can lead to leggy growth and bug problems. Whiteflies, spider mites and scale are the most common indoor pests. Check your plants weekly. If you stay on top of the situation, pests can usually be controlled quite easily with insecticidal soap. For serious infestations, dunk the foliage in a dishpan filled with water and a teaspoon of liquid dishwashing detergent. You can also stick large plants right in the shower. Let the foiage dry and then douse with insecticidal soap.

    Tropical plants that go through the winter in fairly active growth usually benefit from being pruned at least once or twice. This will re-balance the foliage to root mass ratio and will also give you the opportunity to root some new cuttings. Coleus, plectranthus and geraniums respond well to this treatment. When spring comes, repot the plants and start fertilizing.

    2. Taking Cuttings

    Herbaceous, soft-stemmed tropicals such as plectranthus, coleus and geraniums, can be difficult to overwinter. A good option is to take cuttings in the fall and let the “mother” plant die. Root the cuttings in water on a windowsill. Be sure to root succulent, young stems—not stems that have become tough or woody. Put only the stem—no leaves—in the water. Once roots have developed, plant each cuttings in a 3- or 4-inch pot and keep them on a windowsill or under lights. Fertilize regularly. You’ll have a whole batch of new plants for your spring garden, and will be a popular guest at next year’s plant swaps!

    3. Managing Winter Dormancy

    Some tropicals do best with—or may even require—a winter rest. How you care for these plants over the winter depends on the kind of space you have available, and whether the plants are soft-stemmed, woody, or bulb-like. Tropical plants that grow from bulbs or tubers, such as elephant ears, caladium, sweet potato vine and canna lily, should get nipped by frost before they’re brought indoors. This sends the plant a clear message that the end of the season has come. At this point you can do one of two things. You can leave the plants right in their pots over the winter, keeping the soil barely moist, and store the whole pot in a cool, dark place. Or, you can trim off the stems, dig up the bulbs, label them, wrap individually in slightly moistened newspaper or peat moss, place them in a black plastic garbage bag and store a cool, dark place. In either case, it is important that air temperatures remain at about 40 to 50 degrees F. Check the bulbs monthly to make sure they are still firm and solid. If they are drying out, mist the storage material around them with a little water. When spring arrives, repot the bulbs, begin fertilizing regularly, and put the plant in a sunny window.

    Woody-stemmed tropicals, such as jasmine, brugmansia, tibouchina and bananas, should be brought indoors before the first frost. Let the plants rest in a cool place (40 to 50 degrees F) with little or no light—they’ll get the message that winter has arrived and their leaves will gradually yellow and drop. The plants can then spend the winter in an unheated basement, root cellar, unheated garage, or even a cool closet. Make sure the area is relatively dark (try enclosing the whole pot loosely inside a heavy black trash bag) and that the air temperature stays above freezing. In most cases, woody-stemmed tropicals should not be cut back until early spring (unless you can’t fit them into the house!). Water the plants sparingly throughout the winter, checking monthly to see that the soil is barely moist. When early spring arrives, revive the plants by repotting them in fresh soil. Water thoroughly and provide a weak dose of liquid fertilizer. Expose the plants to bright, filtered light, gradually acclimating them to full sun. Try to give them about a month of indoor (or greenhouse) growing time before moving them outdoors.

    When it comes to reintroducing heat-loving tropicals to the outdoors, always do it slowly. Shield them from direct sunlight and wind for at least a week or two. If the plants are acclimated slowly, they’ll slide right into active growth. Too much early spring stress will stunt the plant’s growth—or even kill it.

    The truth is, overwintering tropical plants involves a bit of trial and error. A technique that works well for one type of plant or in one particular winter environment may not be ideal for another. Be prepared to lose a few plants. See the box called Overwintering Techniques, above, for some general recommendations to get you started. For specific information about growing and overwintering more than 100 tropical plants, consider investing in the book Hot Plants for Cool Climates by Susan A. Roth and Dennis Schrader. (Houghton Mifflin 2000).

  • Bring Plants Indoors, Wrap Up Containers

    By Christina Da Silva

    Shorter days and the arrival cooler temperatures should have condo gardeners scurrying around getting ready for winter.

    Now is the time to bring herbs, tender perennials and balmy tropicals indoors and to insulate outdoor containers. With frost on the way, the tropicals – hibiscus, bougainvillea, heliotrope, fuchsia and even the classic annuals (geranium, coleus, impatiens and begonias) migrate indoors.

    Slowly introduce the plants to the indoors: outside during the day, and indoors at night. Gradually increase the time spent indoors until they remain indoors 24/7. Only condos with bright south facing or west facing windows have the right conditions for herb survival. Bring in bay and rosemary before the first frost.

    Not all herbs require warmer temperatures. Mint, chives and tarragon not only survive the winter in insulated pots they need frost to grow well next year.

    Now comes the hard part. Before bringing them in, cut back plants to one-quarter of their original length, flowers and all. Ensure that no bugs hitchhike indoors with the plants by watering the pots until water pours out through the bottom.

    Bugs lurk on the underside of leaves, so remember to spray both sides of the leaves with a diluted soapy water mix (a few drops of dish detergent in a litre of water).

    Because of space limitations, bringing in pots may not be a viable option. Cuttings, which take less room, offer an alternative for saving your favourite plants. Take cuttings from the healthiest plants and root the stems indoors. By spring, the cuttings will have developed into container-ready plants.

    Not all pots are made equal. Ceramic and terra cotta pots, which crack at the first sign of frost, should be emptied and stored upside down in a sheltered spot. Tough frost-resistant containers are a must for over-wintering perennials, shrubs and trees as well as for fall and winter displays. There are plenty of choices, including metal, stone, wood, plastic, fibreglass or good quality plastic resin pots. Shoots are more cold hardy than their roots. For example, Japanese maple (Acer palmatum) grown in the ground can survive -20C, whereas temperatures between -5 and -10C will kill its roots.

    Since the ground and snow cover provides excellent insulation, you don’t need to worry about plants in garden beds. It’s a different story for container gardens; pots don’t provide as much protection to sensitive roots. So, perennials, shrubs and trees over-wintering in pots on balconies require extra insulation from late October to April.

    Insulating pots needn’t be expensive. Consider recycling newspapers. Crush newspapers into enough balls to fill a plastic bag. Then tie or tape the plastic bag around the pot. Bungee cords also work well. Besides newspaper, other more conventional insulation material includes Styrofoam slabs or bubble wrap.

    Cluster the pots together in a wind-sheltered, shady spot. Surround the more tender plants with hardier specimens. Then cover the assortment of pots with a plastic tarp, leaving part of it open for air circulation. Autumn isn’t only about protecting plants; it’s also a time to create dazzling fall containers and plant spring bulbs.

    Replace the summer annuals with fall bloomers, such as mums, asters, pansies, ornamental kale and heather. Later on, these containers can change into soothing winter displays of conifers, dogwood twigs and seed pods.

    Fall is also the time to plant spring flowering bulbs – tulips, daffodils and crocuses – in large insulated containers. Keep the soil moist, not wet. Place the pots in a sheltered spot, away from the wind and sun. Then sit back and relax, knowing a colourful spring is guaranteed.