Author: BGI Fertilizers

  • Selecting The Right Tomato Food

    Selecting The Right Tomato Food

    [cmsms_row data_width=”boxed” data_padding_left=”3″ data_padding_right=”3″ data_color=”default” data_bg_color=”#ffffff” data_bg_position=”top center” data_bg_repeat=”no-repeat” data_bg_attachment=”scroll” data_bg_size=”cover” data_bg_parallax_ratio=”0.5″ data_color_overlay=”#000000″ data_overlay_opacity=”50″ data_padding_top=”0″ data_padding_bottom=”50″][cmsms_column data_width=”1/1″][cmsms_image align=”left” animation_delay=”0″]5768|https://www.bgi-usa.com/wp-content/uploads/shutterstock_311331851-300×200.jpg|medium[/cmsms_image][cmsms_text animation_delay=”0″]

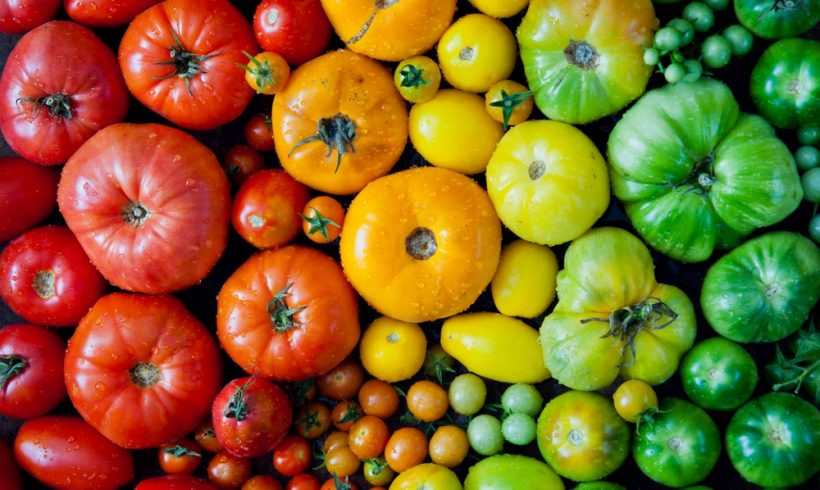
    There are many people that grow tomatoes as a hobby as well as a great way to provide healthy food for the table. Most of the tomato growers are very passionate about their plants and they spend time in researching the right varieties for their location and growing conditions.

    At BGI, we recognize and understand how tomato growers, even those with pots on their patio, quickly become fascinated and very enthusiastic about their crops. It is amazing to see the blooms, the first little tomatoes and finally enjoy a juicy, delicious slice of a tomato you have nurtured and grown on your own.

    [/cmsms_text][cmsms_heading type=”h3″ font_weight=”400″ font_style=”normal” text_align=”default” target=”self” margin_top=”0″ margin_bottom=”20″ animation_delay=”0″]The Fertilizer Issue[/cmsms_heading][cmsms_image align=”right” animation_delay=”0″]5767|https://www.bgi-usa.com/wp-content/uploads/shutterstock_404626066-200×300.jpg|medium[/cmsms_image][cmsms_text animation_delay=”0″]

    Growing tomatoes will require the use of a fertilizer for tomatoes that matches the needs of the developing tomatoes as well as that of the plant. There are different options out there, but not all are a good match for your plants. When considering a fertilizer for tomatoes, it will be important to consider several different factors. One of the most important is the availability of the fertilizer to the plant. Some fertilizers are not immediately available, which means they have to be deployed before the plant requires them.

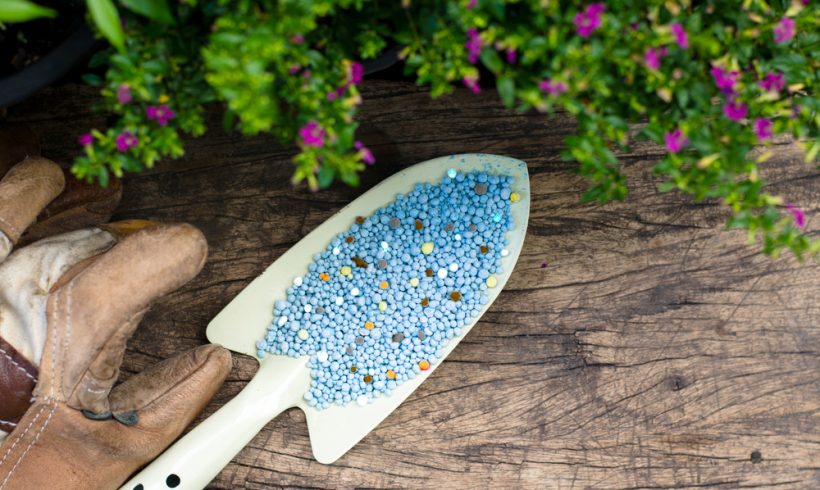
    Others, like our TOMATOGAIN® is a granular application that will be immediately available to the plants. This means that you just have to sprinkle the 8-16-16 fertilizer on the soil and then water, the rest is just a matter of allowing Mother Nature to provide optimal light and heat.

    [/cmsms_text][cmsms_heading type=”h3″ font_weight=”400″ font_style=”normal” text_align=”default” target=”self” margin_top=”0″ margin_bottom=”20″ animation_delay=”0″]Before Getting Started[/cmsms_heading][cmsms_image align=”left” animation_delay=”0″]5771|https://www.bgi-usa.com/wp-content/uploads/shutterstock_134221907-300×200.jpg|medium[/cmsms_image][cmsms_text animation_delay=”0″]

    We recommend before using our fertilizer for tomatoes or any other product, get the soil tested if you are planting in a garden or a raised bed. This will provide all growers with the specific information needed for the right application of fertilizer. Our TOMATOGAIN® is perfect for most typical soil conditions, but in some areas additional organic matter may be important. It is also important to plan the timing of fertilization.
    For maximum growth potential fertilize the plants when they go into the soil. This will assist in building strong root systems and stems. It will be important to fertilize regularly, ideally two times a month, throughout the growing seasons. Do not spread the fertilizer right up to the stem as this can result in burning of the plant.

    Many varieties of tomatoes require staking or caging. This takes all of the pressure off of the stem, allowing the stake or the cage to help support the weight of the green and ripening tomatoes. When they are actively growing this will be important to plant health and tomato production.


    Happy Planting!

    [/cmsms_text][/cmsms_column][/cmsms_row]

  • Beginner’s Guide To Orchid Care

    Beginner’s Guide To Orchid Care

    [cmsms_row data_padding_bottom=”50″ data_padding_top=”0″ data_overlay_opacity=”50″ data_color_overlay=”#000000″ data_bg_parallax_ratio=”0.5″ data_bg_size=”cover” data_bg_attachment=”scroll” data_bg_repeat=”no-repeat” data_bg_position=”top center” data_bg_color=”#ffffff” data_color=”default” data_padding_right=”3″ data_padding_left=”3″ data_width=”boxed”][cmsms_column data_width=”1/1″][cmsms_text animation_delay=”0″]

    Orchids are beautiful flowers and there are more than 25,00 different species of orchids, so that’s why learning orchid care from the Bougainvillea Growers International is vital, especially for beginners who have never grown them. However, the most popular type of orchid that is usually sold are the Phalaenopsis, but other species that are popping up for sale include Cattleya, Cymbidium, Dendrobium, and Oncidium.

    How to Water During Orchid Care

    When it comes to keeping an orchid watered, it is a different procedure than watering a regular plant. Once a week you should actually flood your orchid with lots of water so that it runs right through the pot. That’s because orchids come in growing in mixes that free drain. After a few minutes, do this again. Be sure to only water once a week.

    However, some types require different watering schedule, i.e. Cymbidum needs to be kept moist but not soggy all the time, and Cattleya should be allowed to dry out in-between watering. The best idea is to talk to the place you bought your orchid and find out its specific needs for water, sun and fertilizers.

    Fertilize Orchids Weekly with Weak Fertilizer

    Orchids also only need to be fertilized once a week by using a balanced and complete weak fertilizer mixture during your orchid care routine. They are actually air plants and need a source of oxygen for their roots to grow properly. They should also be repotted at least every two years, especially if they lose their blooms. Some people believe repotting every year is best for their continued growth and good health.

    Make Sure Orchids Get Proper Amount of Light

    You also need to make sure your orchid gets the right amount of sunlight, depending on the variety. Some types need more sunlight than others. If the leaves are bright green, it means they are getting enough, while dark green means not enough and red-green means it has gotten too much light. Black spots on the leaves are another indicator you orchid is getting too much sun, so be sure to appropriately do your orchid care.

    Bougainvillea Growers International Are Experts in Plant Care

    If you want the best possible information on orchid care, turn to Bourgainvillea Growers International, which began in 1994. It has experience in developing all kinds of fertilizer products on its more than 67 acres, and supplies special fertilizers for plants like orchids to customers all over the world.

    [/cmsms_text][/cmsms_column][/cmsms_row]

  • What You Should Know About Rose Fertilizer

    What You Should Know About Rose Fertilizer

    Do you love the smell of roses blooming in your garden? Have you ever wondered how to grow bigger, brighter blossoms that your neighbors will admire from afar? For over 20 years, we have helped gardening enthusiasts, commercial growers and plant brokers provide premium nutrition for their plants. If you are not sure whether you want to use rose fertilizer in your garden, here are three benefits to consider for your plants.

    Large, Healthy Blossoms

    Whether you are growing roses for your own personal enjoyment or entering a floral exhibition, beauty is often associated with size. As a matter of fact, a single rose with a large, colorful blossom can have a greater impact than a dozen smaller roses. To get the same oversized elegance from your bushes, use our slow-release plant food as directed throughout the season.

    Fast Growth and Development

    For those who would like their roses to bloom faster, BGI rose fertilizer encourages rapid growth and optimal nutrition. If you would like to enjoy your rose bushes even longer this year, start fertilizing early on. For climbing roses, swift development is crucial to the natural, flowing appearance of the blossoms. Like ivy, they enhance the exterior of a garden trellis or home, but require significant nutrients and guidance.

    Strong, Supportive Stems

    Another benefit of BGI fertilizers is that your flowers will have strong, flexible stems. Aside from the roots, this is arguably the most important part of the rose for long-term health and stability. While it is possible to grow roses with thin, delicate stems, you ultimately want to establish a solid pathway for nutrients to reach each part of the plant.

    More Than One Use

    Finally, BGI understands the demand for versatile products in the gardening community. That is why we have designed our fertilizers to encompass many different types of plants. For example, you can successfully use the same fertilizer for English roses, hybrids and miniature roses. On the other hand, perennials and annuals will experience growth with this fertilizer as well, making it easier to care for several distinct plant species. This eliminates the need to buy an array of expensive fertilizers, making efficient use of both gardening time and money.

    When it comes to tending your leafy charges and maintaining the natural appeal of your garden, BGI is a leading provider of rose fertilizer and other specially formulated products. Locate a retailer in your area or use our simple online form to contact us today. For more information about rose fertilizer contact BGI at (561) 374-9216.

  • Summer Blackberry Jam

    Summer Blackberry Jam

    [cmsms_row data_width=”boxed” data_padding_left=”3″ data_padding_right=”3″ data_color=”default” data_bg_color=”#ffffff” data_bg_position=”top center” data_bg_repeat=”no-repeat” data_bg_attachment=”scroll” data_bg_size=”cover” data_bg_parallax_ratio=”0.5″ data_color_overlay=”#000000″ data_overlay_opacity=”50″ data_padding_top=”0″ data_padding_bottom=”50″][cmsms_column data_width=”1/1″][cmsms_heading type=”h1″ font_weight=”400″ font_style=”normal” text_align=”default” target=”self” margin_top=”0″ margin_bottom=”20″ animation_delay=”0″]Summer Blackberry Jam[/cmsms_heading][cmsms_image align=”left” animation_delay=”0″]3905|https://www.bgi-usa.com/wp-content/uploads/product-iconsCITRUSGAIN-2lb-Bag-Citrus-Fertilizer-Citrus-Plant-Food-0-267×300.jpg|medium[/cmsms_image][cmsms_text animation_delay=”0″]

    It’s summer and you’ve been fertilizing your berry plants with CITRUSGAIN® all year. You are reaping what you’ve sown, but, what are you going to do with all those BERRIES?? Make some jam of course!  It is so easy and you only need a few supplies and ingredients. Share a memory with the children or grandchildren. Who knows, mastering this old-timey kitchen craft might get you started on all kinds of kitchen wizardry!

    If you have a lot like I do, you can use the jam for all kinds of things like; BBQ sauce, thumbprint cookies, syrups, smoothies, healthy topping option for waffles or pancakes…The list goes on and on!

    [/cmsms_text][cmsms_heading type=”h3″ font_weight=”400″ font_style=”normal” text_align=”default” target=”self” margin_top=”0″ margin_bottom=”20″ animation_delay=”0″]Supplies[/cmsms_heading][cmsms_image align=”right” animation_delay=”0″]4878|https://www.bgi-usa.com/wp-content/uploads/jars-300×200.jpg|medium[/cmsms_image][cmsms_text animation_delay=”0″]

    • Large Stock Pot – big enough to hold your jars and deep enough to cover the jars with water
    • Jar Lifter – for grabbing those super hot jars from the pot
    • Jelly Jars Pack – mason jars with 2 part lids
    • A rack that will sit in the bottom of your stock pot (check out this affordable canning pot and rack set: Granite Ware 21.5 Quart)
      (it is absolutely necessary to place something on the bottom of your stock pot, so that the bottoms of the canning jars do not get too hot, and fall off when you remove the jars.)
    • Ladle for scooping your jam into the jars
    • A Funnel – to make sure you jam goes right into the jars without a mess.
    • Cookie tray – lined with towels for cooling the jars

    [/cmsms_text][cmsms_heading type=”h3″ font_weight=”400″ font_style=”normal” text_align=”default” target=”self” margin_top=”0″ margin_bottom=”20″ animation_delay=”0″]Jam Ingredients[/cmsms_heading][cmsms_text animation_delay=”0″]

    • Fresh Blackberries – 5 cups
    • Pectin – 1 package dry pectin (1 ¾ ounce)
    • Sugar – 7 cups
    • Lemon juice – (you can use a few drops at a time if your jam is too sweet before you jar it up)

    Prep:

    Before you use your jars for the first time be sure to sterilize them. Check the top of your jars by running your finger around the lip to make sure there are no chips, you want a good seal when canning, then wash the jars in hot soapy water.  Put your towel or rack on the bottom of the pot and put your jars in the pot.  Fill your stock pot with water just high enough to fill and cover the jars, boil them lightly for 15 minutes.

    Wash the lids in soapy water then put them in a smaller pot on a low simmer and keep them warm until you are ready to seal the jars, this prepares the seal for canning. When the 15 minutes is up you can place the jars on a towel to dry while you make your jam.

    [/cmsms_text][cmsms_heading type=”h3″ font_weight=”400″ font_style=”normal” text_align=”default” target=”self” margin_top=”0″ margin_bottom=”20″ animation_delay=”0″]Instructions[/cmsms_heading][cmsms_image align=”left” animation_delay=”0″]4877|https://www.bgi-usa.com/wp-content/uploads/jamin-e1471030102116.jpg|full[/cmsms_image][cmsms_text animation_delay=”0″]

    • Place the berries in a large stock pot
    • Add pectin a little at a time, stirring constantly
    • Heat on high, stirring constantly until mixture comes to a full boil
    • While stirring, add the sugar.
    • Boil for 1 minute,
    • Taste the jam, be careful it’s hot! If it is too sweet, add lemon juice a few drops at a time until it is flavored to your liking.
    • Remove from heat and ladle into clean 8oz jars, leaving 1/4 inch space at the top
    • Wipe the rim of the jars, then put canning lids and rings on fingertip tight. (Fingertip tight means to screw the lids down just until you start to feel resistance when you tighten.)
    • Place the sealed jars in the clean stock pot – Be sure there is enough water to cover the jars Cover your pot and let them boil for 10-15 minutes
    • The jars need to rest for 12 hours in that very spot.  After they are completely cool test the seal by pressing on the lit, it shouldn’t flex up or down. That means the seal is air-tight you can now tighten that lid down and they are ready to store in a cool dry place for 12 months (if they last that long!)

    Happy Canning!

    [/cmsms_text][/cmsms_column][/cmsms_row]

  • Summertime

    [cmsms_row][cmsms_column data_width=”1/1″][cmsms_text]

    Summertime is the perfect time to do something good for you and your children!  Vitamin D is important, and in as little as 5, 10 or 15 minutes a day you can improve your mind, body and spirit by being outside. Those few minutes connecting with nature can improve memory and attention by 20%! A natural stress reliever, nature can reduce anxiety, increase immunity, lower your heart rate and decrease blood pressure with regular respites outdoors. For the spiritual or religious, nature is where you come back to center. It is a reminder that we are human be-ings not human do-ings.

    So, I hear you, “that’s all well and good, but I’ve got these bored kids.  What am I supposed to do with them?”  I come prepared with suggestions!  You can start simple, go for a walk in the woods, take a dip in the pool; set up a sprinkler tunnel and let them race through it. All good exercise that helps those little ones sleep better at night. And you too!

    So now that you have your creative juices flowing from all that fresh air…Here are crafts you can do to get everyone thinking about outside! You don’t have to have a big back yard for these activities to be relevant, just a few supplies and some free time!

    [/cmsms_text][/cmsms_column][/cmsms_row][cmsms_row data_width=”boxed” data_padding_left=”3″ data_padding_right=”3″ data_color=”default” data_bg_color=”#ffffff” data_bg_position=”top center” data_bg_repeat=”no-repeat” data_bg_attachment=”scroll” data_bg_size=”cover” data_bg_parallax_ratio=”0.5″ data_color_overlay=”#000000″ data_overlay_opacity=”50″ data_padding_top=”0″ data_padding_bottom=”50″][cmsms_column data_width=”1/1″][cmsms_heading type=”h1″ font_weight=”400″ font_style=”normal” text_align=”default” target=”self” margin_top=”0″ margin_bottom=”20″ animation_delay=”0″]1. Hand Painted Garden Stones[/cmsms_heading][cmsms_image align=”right” caption=”http://craftsbyamanda.com/painted-rock-garden-markers/” link=”http://craftsbyamanda.com/painted-rock-garden-markers/” animation_delay=”0″]4817|https://www.bgi-usa.com/wp-content/uploads/rock-garden-markers2.jpg|full[/cmsms_image][cmsms_text animation_delay=”0″]

    What you’ll need:

    Patio Paint
    Patio Paint clear coat
    DecoArt glass paint markers (Sharpies can be used instead, but will require longer dry time)

    To make these garden markers you will need some smooth stones. You can find them in your yard or garden, or you can buy a bag from the craft store. Some plants will require a larger rock because of the number of letters in its name, so it’s a good idea to plan that ahead of time.

    When you’re ready to get started:

    1. Paint the top of each one with your patio paint, let them dry, and paint a second coat. You don’t need to paint the bottoms as they will be touching the earth.
    2. When fully dry, you can begin writing on your rock.
    3. To decorate; utilize the handle end of a large craft paintbrush to dot on various spots or swirls in different colors, a smaller paintbrush handle to add smaller spots, and use the tip of a pencil or a toothpick to add the smallest of details.
    4. Allow rocks to dry for 2-3 hours.
    5. Apply clear coat and let sit overnight.

    Originally published: http://craftsbyamanda.com/painted-rock-garden-markers/

    [/cmsms_text][/cmsms_column][/cmsms_row][cmsms_row data_width=”boxed” data_padding_left=”3″ data_padding_right=”3″ data_color=”default” data_bg_color=”#ffffff” data_bg_position=”top center” data_bg_repeat=”no-repeat” data_bg_attachment=”scroll” data_bg_size=”cover” data_bg_parallax_ratio=”0.5″ data_color_overlay=”#000000″ data_overlay_opacity=”50″ data_padding_top=”0″ data_padding_bottom=”50″][cmsms_column data_width=”1/1″][cmsms_heading type=”h1″ font_weight=”400″ font_style=”normal” text_align=”default” target=”self” margin_top=”0″ margin_bottom=”20″ animation_delay=”0″]2. Flip Flop Planters[/cmsms_heading][cmsms_image align=”left” caption=”http://www.garden-share.com/photo/flower-pics-016″ link=”http://www.garden-share.com/photo/flower-pics-016″ animation_delay=”0″]4813|https://www.bgi-usa.com/wp-content/uploads/Flip-Flop.jpg|full[/cmsms_image][cmsms_text animation_delay=”0″]

    This project takes only minutes, and you can enjoy the fruits of your labor all summer long!

    What you’ll need:

    1. Flip flops
      2. Coffee mugs, on hand or new

    When you’re ready to start:

    1. Choose a placement for your Flip Flop Flower Pots, and nail the flip flops to the wall, fence, etc.
    2. Insert coffee mugs.
    3. Full coffee mugs with succulents, they will last for weeks and weeks in a sunny spot.

    For extra fun, considering painting the coffee mugs or flip flops!

    Originally published: http://www.garden-share.com/photo/flower-pics-016

    [/cmsms_text][/cmsms_column][/cmsms_row][cmsms_row data_width=”boxed” data_padding_left=”3″ data_padding_right=”3″ data_color=”default” data_bg_color=”#ffffff” data_bg_position=”top center” data_bg_repeat=”no-repeat” data_bg_attachment=”scroll” data_bg_size=”cover” data_bg_parallax_ratio=”0.5″ data_color_overlay=”#000000″ data_overlay_opacity=”50″ data_padding_top=”0″ data_padding_bottom=”50″][cmsms_column data_width=”1/1″][cmsms_heading type=”h1″ font_weight=”400″ font_style=”normal” text_align=”default” target=”self” margin_top=”0″ margin_bottom=”20″ animation_delay=”0″]3. Hand Made Wind Chime[/cmsms_heading][cmsms_image align=”right” animation_delay=”0″]4814|https://www.bgi-usa.com/wp-content/uploads/craft-chime.jpg|full[/cmsms_image][cmsms_text animation_delay=”0″]

    Listen to the tinkling sounds of buttons, bells, and bottle caps with this outdoor chime.

    What You’ll Need: Bottle caps (crown bottle caps, $3 to $4 for 50; amazon.com), outdoor craft paint (optional), paintbrush (optional), fishing line, scissors, bells, tacky glue, buttons, 4″-tall flowerpot (plastic or ceramic) with a hole in the bottom, hot-glue gun

    Make It

    1. Paint bottle caps in the colors of your choice. Let dry. (Skip this step if buying colored bottle caps.)

    2. Cut seven 18″ pieces of fishing line. Tie a bell to the end of each strand.

    3. Put a dot of tacky glue on bottle cap, set the fishing line in the glue (starting about an inch above the bell), and sandwich it with a button. Repeat five or six times per strand, about 12″ up the piece of fishing line. Let dry.

    4. Feed the ends of all strands through the holes of a large button (it must be bigger than the pot’s drainage hole) and secure with a knot about 4 1/2″ above the top bottle cap. Feed the strands up through the drainage hole.

    5. So that the strands don’t cluster in the middle, hot-glue fishing line to the inside edge of the pot, evenly spaced around the circumference.

    6. Tie another piece of fishing line in a tight knot to the top to hang.

    Originally published in the June 2012 issue of Parents magazine.

    [/cmsms_text][/cmsms_column][/cmsms_row][cmsms_row data_width=”boxed” data_padding_left=”3″ data_padding_right=”3″ data_color=”default” data_bg_color=”#ffffff” data_bg_position=”top center” data_bg_repeat=”no-repeat” data_bg_attachment=”scroll” data_bg_size=”cover” data_bg_parallax_ratio=”0.5″ data_color_overlay=”#000000″ data_overlay_opacity=”50″ data_padding_top=”0″ data_padding_bottom=”50″][cmsms_column data_width=”1/1″][cmsms_text animation_delay=”0″]

    Let nature restore you while the days are long, the sky is blue and the weather is warm!

    Until next time,

    Joanna

    [/cmsms_text][/cmsms_column][/cmsms_row]

  • 8 Tips To Healthier Plumper Tomatoes

    Plenty of people love the taste of round, juicy tomatoes, and growing your own can be deliciously rewarding. Here’s how you can grow the perfect crop:

    Pick a good location

    Tomatoes love to soak up sunlight. So don’t put them in dark, shady areas. They’ll thrive more if you put them somewhere they can get as much sunlight as they need.

    Provide a trellis or stake

    Your tomatoes love to climb and grow on stakes so provide one to help your plants develop faster.

    Check your soil

    Your tomatoes need nutrients. So it’s important to know if you’ve got nutrient-rich soil or not. If your soil is already filled with compost, then you’re good to go. However, if your soil is poor in nutrients, then it’s a wise idea to shop for fertilizers to put into the soil.

    Cut back on the nitrogen

    When it comes to fertilizing tomatoes, you can have too much of a good thing. Too much nitrogen, for instance, might give you a healthy, green tomato plant but with few tomatoes instead, says SF Gate. You could reverse the effects by feeding more phosphorus to your plants to balance the shot of excess nitrogen but you’ll have to experiment with the amount and this could take a long time. Better to prevent it from happening in the first place.

    Fertilizer first

    When you first plant your tomatoes in the garden, excited and thrilled for the day you’ll see your garden alive with round, red tomatoes, remember to feed them with fertilizer. The next time you feed them fertilizer, though, you’ll have to wait until a fruit springs from the plant. That’s when you can resume feeding your plant with fertilizers.

    Feeding times

    Unlike other plants that require weekly doses, you only have to feed your tomatoes with once every week or every two weeks. So be careful not to overdo it, not unless you want your tomatoes to suffer.

    Water management

    Not enough water can cause your soil to take in too many nutrients, which could end up burning your tomato plant. That’s the last thing you want. So make sure the plant is watered well enough before you apply any fertilizer.

    Putting In fertilizer

    Once you’ve watered the plant, then put fertilizer into the ground six inches from the base of the plant. That way, the fertilizer won’t be too close and won’t your plant’s stem as a result.

    For more information about finding the right tomato fertilizers (TOMATOGAIN®), contact Bgi-usa.com!

  • Choosing The Best Orchid Plant Care Is Easy

    Orchids are beautiful plants grown by people all over the world. Like many other plants, orchids are not necessarily difficult to grow, but you still need to take good care of them if you want them to grow large and bright. The best part of growing orchids is that these days, there are so many varieties available, including hybrids, that you can choose the orchid that is easiest to grow and will look best in your own garden. Many orchids bloom once a year, for up to 10 weeks at a time, so their short blooming time means you will want to make the most of them while they are here.

    Exceptional orchid plant care does not have to be difficult or cost a lot of money. At Bougainvillea Growers International (BGI), we offer our own line of fertilizers for nearly every type of plant, including orchids, and we can assist you with any of your plant- or flower-growing needs.

    BGI Offers Excellent Advice and Numerous Well-Made Products

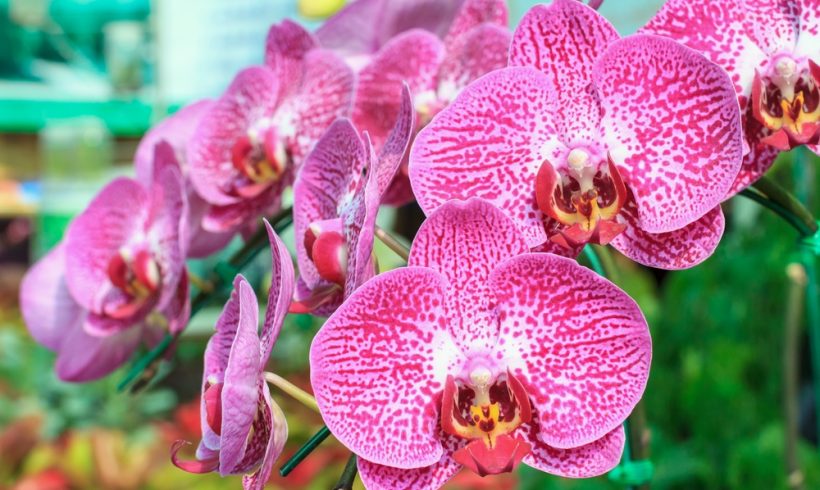
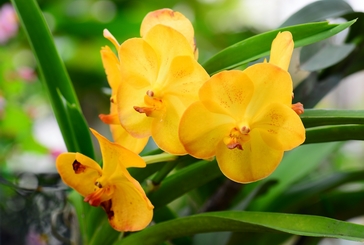
    At BGI, our website offers advice on topics such as how to get the healthiest plants and flowers, the advantages of going organic, and how to tell when your plant is lacking in nutrients. In addition to expert advice, our premier line of products means that whether you are growing citrus fruits, tomatoes or trees and shrubs, you can give your plants exactly what they need to grow and thrive. Our high-quality product called Orchidgain®, offers the right blend of nutrients so that you only need this one product. Orchidgain® contains no urea, is water-soluble and works in no soil mediums like charcoal, bark or stone. The product has been researched by universities and commercial growers, and produces plants that are large and vibrant.

    Best of all, BGI’s products are made with the right balance of vitamins and minerals perfect for the successful growing of orchids. Orchids can grow outside or indoors in certain lighting, and they produce large colorful blossoms that will look good in any garden. Using the right type of fertilizer enables them to grow faster and more beautiful.

    Come to Us First

    Our products are made with natural ingredients and are scientifically researched to make sure they produce the results that are important to growers. You can order our products in two ways – through our website or from one of many fine gardening centers throughout the country. Our fertilizers are species-specific, so they are guaranteed to include everything your plant needs to grow well. When you are looking for orchid plant care, there is simply no need to look anywhere else.

  • Finding The Right Fertilizer For Roses Is Important

    When you decide to grow roses, there are some important items that are necessary if you want your flowers to look beautiful and grow well. Roses are not difficult to grow, but they do need certain things if you want your rose garden to be a success. This includes regular pruning, the right products applied to keep bugs away, excellent soil and of course, a good fertilizer. A nutrient-rich fertilizer can mean the different between small, dull-looking roses and bright and beautiful petals and leaves. Fertilizers take care of the entire flower, from the bottom of the stem to the top of the highest petal, and ensure it is getting the nutrients it needs to grow strong and beautiful. At Bougainvillea Growers International (BGI), we offer fertilizers for all types of plants, including roses, and we only sell high-quality products that have been proven to be successful.

    Types of Fertilizers Available

    A fertilizer for roses can come in many forms, but most are granular that you simply sprinkle on the soil after you plant the roses themselves. Rose fertilizer is filled with the vitamins and minerals that roses need to grow and thrive, and it starts at the root of the plant so that the entire plant receives the nutrients it needs. At BGI, we specialize in Rosegain® fertilizer, which is a slow-release fertilizer that continues to feed the plants long after it is sprinkled on the soil. Rosegain® will never burn the plant when used as directed, and it produces abundant, long-lasting flowers. Developed by commercial growers, Rosegain® is an excellent choice that will never disappoint the rose-grower. It enables roses to grow bigger, brighter and faster than an all-purpose fertilizer..

    We Offer More Than Just Rose Fertilizer

    Fertilizer for roses is not our only product, however. At BGI, we specialize in all types of fertilizers for different types of plants, including hibiscus, palm trees, tomatoes, citrus plants and orchids. We also offer several excellent products that are good for many different types of food and flower plants, including trees, shrubs, house plants and many more. In addition, we offer a loyalty program that rewards you for your purchases and allows discounts on future purchases, starting with a free test of your soil every year so that you can know the health status of your soil before you plant anything.

    For over 20 years, BGI has been offering specialized fertilizers of the highest quality, and we are constantly improving both our products and our loyalty program. Whether you’re a homeowner, a commercial landscaper, or a business owner who has a full-time gardener, choosing BGI products is smart and inexpensive, and is guaranteed to produce the best-looking plants you’ve ever seen.

  • Orchids 101

    Orchids 101

    [cmsms_row data_width=”boxed” data_padding_left=”3″ data_padding_right=”3″ data_color=”default” data_bg_color=”#ffffff” data_bg_position=”top center” data_bg_repeat=”no-repeat” data_bg_attachment=”scroll” data_bg_size=”cover” data_bg_parallax_ratio=”0.5″ data_color_overlay=”#000000″ data_overlay_opacity=”50″ data_padding_top=”0″ data_padding_bottom=”50″][cmsms_column data_width=”1/1″][cmsms_heading type=”h1″ font_weight=”400″ font_style=”normal” text_align=”default” target=”self” margin_top=”0″ margin_bottom=”20″ animation_delay=”0″]Introduction[/cmsms_heading][cmsms_text animation_delay=”0″]

    Exotic, beautiful, with thousands of species and as many hybrids, orchids are popular with homeowners and can be an obsession for the serious collector. And contrary to popular belief, they’re not difficult to grow.

    Many orchids thrive in Florida’s heat and humidity, like Cattleya and Phalaenopsis, and can do well in the home and around the yard.

    Most orchids need to be repotted every few years, and many can be divided into smaller plants. Orchids typically prefer at least partial shade or filtered sunlight, and should be protected from cold temperatures.

    [/cmsms_text][cmsms_heading type=”h1″ font_weight=”400″ font_style=”normal” text_align=”default” target=”self” margin_top=”0″ margin_bottom=”20″ animation_delay=”0″]Orchid Potting Media[/cmsms_heading][cmsms_text animation_delay=”0″]

    Most orchids are epiphytes and they need special media in which to grow.

    Some of the most common ingredients in commercially available orchid mixes are chopped tree fern fiber, chopped fir tree bark, osmunda fiber, charcoal, and volcanic rock. These materials all help to create the loose, well-drained environment that orchids crave.

    Choose from containers made of plastic, clay, wire, or redwood. Some orchids can be mounted on a piece of cork or other bark. Every two years or so you’ll need to replace the orchid growing media for each of your plants

    [/cmsms_text][cmsms_heading type=”h1″ font_weight=”400″ font_style=”normal” text_align=”default” target=”self” margin_top=”0″ margin_bottom=”20″ animation_delay=”0″]Repotting Orchids[/cmsms_heading][cmsms_text animation_delay=”0″]

    Orchids should be repotted when the media breaks down or the plant gets too big for the pot. You’ll use the same procedures when you want to divide an orchid to create a new plant.

    To repot an orchid, first remove the old media, as well as any dead or diseased roots before placing it in the new pot or on the new mounting. After repotting, use clips to secure the orchid until it’s established. Water your plant right away, but don’t fertilize for at least several weeks.

    [/cmsms_text][cmsms_heading type=”h1″ font_weight=”400″ font_style=”normal” text_align=”default” target=”self” margin_top=”0″ margin_bottom=”20″ animation_delay=”0″]Why Won’t My Orchid Bloom?[/cmsms_heading][cmsms_text animation_delay=”0″]

    One of the biggest mysteries for some gardeners is why their orchids won’t bloom. If your orchid sits in a dark corner, try moving it closer to a windowsill. Most orchids prefer bright, indirect light and won’t bloom unless they’re getting it.

    Next, think about how you fertilize. Orchids need nutrients, but applying too much fertilizer can inhibit blooming. Consider how old your orchid is. Some orchids won’t bloom until they’re at least five years old.

    Also, many people aren’t aware that most orchids need a 15- to 20-degree difference between day and night temperatures in order to flower.

    [/cmsms_text][cmsms_heading type=”h1″ font_weight=”400″ font_style=”normal” text_align=”default” target=”self” margin_top=”0″ margin_bottom=”20″ animation_delay=”0″]Orchid Pests and Diseases[/cmsms_heading][cmsms_text animation_delay=”0″]

    The most common orchid pests are scale, mealy bugs, thrips, and mites, especially if you’re growing orchids as houseplants.

    You can treat small pest problems on some orchids by dabbing the pests with a cotton swab that’s been dipped in rubbing alcohol. For larger infestations, you can wash the plants with water or use a horticultural oil or soap spray that’s safe for use on orchids. You may need to repeat this process to get the pests in check.

    If the pests still won’t go away, you can search for a stronger insecticide that’s safe to use, though you should always start with the least toxic products first.

    Orchids that are suffering from a disease may show symptoms like streaks, blotches, or even crinkling on their leaves, roots, or flowers. If you suspect a problem, the first step is always to isolate sick plants so that the pathogen can’t spread to healthy plants.

    With some diseases, you can remove the affected tissue with a clean knife and then treat the orchid with an appropriate bactericide or fungicide. In other situations, the best strategy is to dispose of the infected plants.

    Cut down on future disease problems by creating a healthy growing environment and practicing good sanitation. Provide good air movement, avoid getting the foliage and flowers wet, and always use clean tools when transplanting and propagating your orchids.

    Remember to check your orchids often so that you can take action before small problems from become bigger ones.

    [/cmsms_text][cmsms_text animation_delay=”0″](1) The information found within this article was provided by the University of Florida’s IFAS Extension. Visit http://gardeningsolutions.ifas.ufl.edu/plants/ornamentals/orchids.html for more information.[/cmsms_text][/cmsms_column][/cmsms_row]