Summertime is the perfect time to do something good for you and your children! Vitamin D is important, and in as little as 5, 10 or 15 minutes a day you can improve your mind, body and spirit by being outside. Those few minutes connecting with nature can improve memory and attention by 20%! A natural stress reliever, nature can reduce anxiety, increase immunity, lower your heart rate and decrease blood pressure with regular respites outdoors. For the spiritual or religious, nature is where you come back to center. It is a reminder that we are human be-ings not human do-ings.
So, I hear you, “that’s all well and good, but I’ve got these bored kids. What am I supposed to do with them?” I come prepared with suggestions! You can start simple, go for a walk in the woods, take a dip in the pool; set up a sprinkler tunnel and let them race through it. All good exercise that helps those little ones sleep better at night. And you too!
So now that you have your creative juices flowing from all that fresh air…Here are crafts you can do to get everyone thinking about outside! You don’t have to have a big back yard for these activities to be relevant, just a few supplies and some free time!
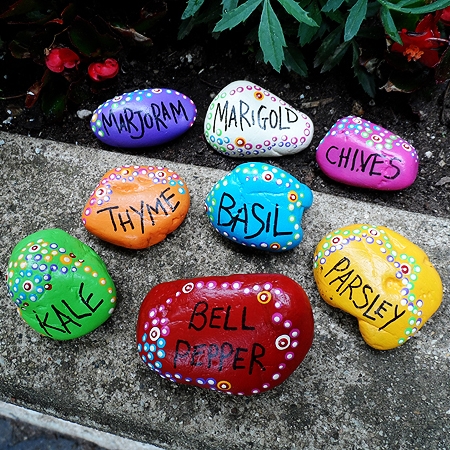
1. Hand Painted Garden Stones
What you’ll need:
Patio Paint
Patio Paint clear coat
DecoArt glass paint markers (Sharpies can be used instead, but will require longer dry time)
To make these garden markers you will need some smooth stones. You can find them in your yard or garden, or you can buy a bag from the craft store. Some plants will require a larger rock because of the number of letters in its name, so it’s a good idea to plan that ahead of time.
When you’re ready to get started:
- Paint the top of each one with your patio paint, let them dry, and paint a second coat. You don’t need to paint the bottoms as they will be touching the earth.
- When fully dry, you can begin writing on your rock.
- To decorate; utilize the handle end of a large craft paintbrush to dot on various spots or swirls in different colors, a smaller paintbrush handle to add smaller spots, and use the tip of a pencil or a toothpick to add the smallest of details.
- Allow rocks to dry for 2-3 hours.
- Apply clear coat and let sit overnight.
Originally published: http://craftsbyamanda.com/painted-rock-garden-markers/
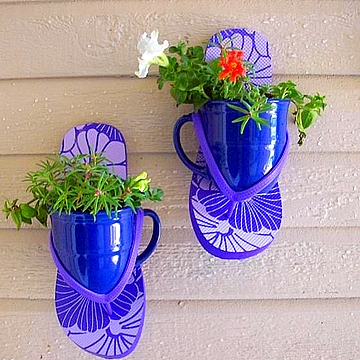
2. Flip Flop Planters
This project takes only minutes, and you can enjoy the fruits of your labor all summer long!
What you’ll need:
- Flip flops
2. Coffee mugs, on hand or new
When you’re ready to start:
- Choose a placement for your Flip Flop Flower Pots, and nail the flip flops to the wall, fence, etc.
- Insert coffee mugs.
- Full coffee mugs with succulents, they will last for weeks and weeks in a sunny spot.
For extra fun, considering painting the coffee mugs or flip flops!
Originally published: http://www.garden-share.com/photo/flower-pics-016
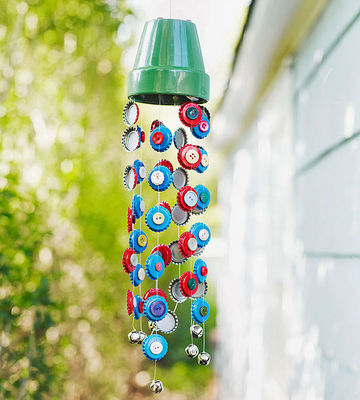
3. Hand Made Wind Chime

Let nature restore you while the days are long, the sky is blue and the weather is warm!
Until next time,
Joanna


