[cmsms_row data_padding_bottom=”15″ data_padding_top=”0″ data_color=”default” data_width=”boxed”][cmsms_column data_width=”1/1″][cmsms_heading type=”h5″ font_weight=”400″ font_style=”italic” text_align=”center” target=”self” margin_top=”0″ margin_bottom=”0″ animation_delay=”0″]Looking for a green reprieve in a concrete jungle, and creating one when there isn’t.[/cmsms_heading][/cmsms_column][/cmsms_row][cmsms_row data_width=”boxed” data_color=”default” data_padding_top=”0″ data_padding_bottom=”15″][cmsms_column data_width=”1/1″][cmsms_image align=”left” caption=”B.P. = Before plants” animation_delay=”0″]6392|https://www.bgi-usa.com/wp-content/uploads/The-Project.Improve-This-Ugly-Spot-300×300.png|medium[/cmsms_image][cmsms_text animation_delay=”0″]
.
Driving through the urban complex that is the Cape Coral Industrial Park to arrive at our office, it was evident something was missing: any green at all and loving nature like we do, it was difficult to miss the inspiration that flourishing, abundant green life creates. Enter our solution: A Garden Makeover, BGI Office Edition.
True Floridian’s that we are, (well, of the three of us, two are true Florida Crackers, the other is a transplant! She’s adjusted well enough over the years though), but I digress; Floridians that we are, or have become accustomed to being, we took it upon ourselves to begin our garden project just as the summer rolled in. Heat or not, we were prepared to create something we’d feel joy by seeing, something that vibrated with life and growth and possibilities.
[/cmsms_text][/cmsms_column][/cmsms_row][cmsms_row data_padding_bottom=”0″ data_padding_top=”0″ data_color=”default” data_width=”boxed”][cmsms_column data_width=”1/1″][cmsms_heading type=”h3″ font_weight=”400″ font_style=”italic” text_align=”center” target=”self” margin_top=”0″ margin_bottom=”0″ animation_delay=”0″]Step One: Measure Twice, Cut Once[/cmsms_heading][cmsms_heading type=”h5″ font_weight=”400″ font_style=”normal” text_align=”center” target=”self” margin_top=”0″ margin_bottom=”20″ animation_delay=”0″]and then it’s time to shop!![/cmsms_heading][cmsms_text animation_delay=”0″]
Before we headed to the store we had three objectives: clean out the space, measure the space, and do some research about which plants would be best for the space – sand instead of soil, constantly sunny and totally exposed.
To combat the nutritionally void sand, we concluded a raised bed would allow us the most flexibility – it could be filled with something much more nutrient-dense (hello, BGI’s Quick Draining Soil, an unparalleled mixture of dolomite, 2 types of peat and pine bark!) and it would be easily removable when the time came to move on to bigger and better offices! We also concluded hardy, full sun plants were a must – so began our dive into the world of flowering ornamentals and xeriscape-loving vines and grasses.
Plan in hand, we were off to our local garden centers to turn our green reprieve into a reality.
[/cmsms_text][/cmsms_column][/cmsms_row][cmsms_row data_padding_bottom=”0″ data_padding_top=”0″ data_color=”default” data_width=”boxed”][cmsms_column data_width=”1/2″][cmsms_image align=”center” animation_delay=”0″]6406|https://www.bgi-usa.com/wp-content/uploads/Pretty-Plants-2-300×300.jpg|medium[/cmsms_image][cmsms_text animation_delay=”0″]
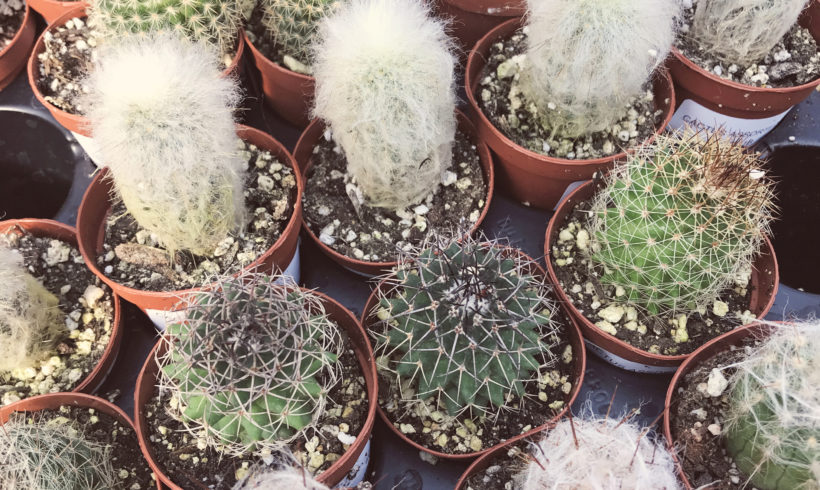
OOoo Succulents! How we love thee!
[/cmsms_text][/cmsms_column][cmsms_column data_width=”1/2″][cmsms_image align=”center” animation_delay=”0″]6404|https://www.bgi-usa.com/wp-content/uploads/Reppin-BGI-2-300×300.jpg|medium[/cmsms_image][cmsms_text animation_delay=”0″]
Devan poking around the RS Walsh “In the Garden” Garden Center
[/cmsms_text][/cmsms_column][/cmsms_row][cmsms_row data_padding_bottom=”0″ data_padding_top=”0″ data_color=”default” data_width=”boxed”][cmsms_column data_width=”1/2″][cmsms_image align=”center” animation_delay=”0″]6405|https://www.bgi-usa.com/wp-content/uploads/Reppin-BGI-3-300×300.jpg|medium[/cmsms_image][cmsms_text animation_delay=”0″]
Me, too excited about our plant selection from MRT Lawn & Garden Center
[/cmsms_text][/cmsms_column][cmsms_column data_width=”1/2″][cmsms_image align=”center” animation_delay=”0″]6403|https://www.bgi-usa.com/wp-content/uploads/Fun-Out-Shopping-3-300×300.jpg|medium[/cmsms_image][cmsms_text animation_delay=”0″]
Lane, at Home Depot picking what will be the stars of our garden – Crotons & Hibiscus!
[/cmsms_text][/cmsms_column][/cmsms_row][cmsms_row data_width=”boxed” data_color=”default” data_padding_top=”0″ data_padding_bottom=”0″][cmsms_column data_width=”1/1″][cmsms_text animation_delay=”0″]
We ended our trip with wood for the raised bed, wood stain and rollers to paint, outdoor all-purpose spray paint for our parking blocks (they were a little dull!), a few bags of pine mulch (to fill around the raised bed), two types of croton (each 2 gallon), one 2 gallon yellow hibiscus, two 2 gallon mandevillas, two 6″ pots of maiden grass, one 6″ purple queen, and our wildcard, a 2 gallon Tropicanna Canna Lily.
Luckily this transformation project took place in front of our warehouse, where we had plenty of the BGI Select Quick Draining Soil on hand! In total we used 12 bags, or 12 cubic feet to fill the raised garden once it was constructed.
[/cmsms_text][cmsms_heading type=”h3″ font_weight=”400″ font_style=”normal” text_align=”center” target=”self” margin_top=”0″ margin_bottom=”20″ animation_delay=”0″]Step Two: Watch Out, We’re Using Power Tools[/cmsms_heading][/cmsms_column][/cmsms_row][cmsms_row data_width=”boxed” data_color=”default” data_padding_top=”0″ data_padding_bottom=”10″][cmsms_column data_width=”1/2″][cmsms_text animation_delay=”0″]
Thanks to the measurements we took before our outing, we had any cuts needed on the wood made at our local Home Depot prior to purchase. When we arrived back at the office, all that was left for us was to stain the wood, place the wood, and screw them together! Staining both took time to finish and time to dry, so we left our wood to set for a few days before we got back to constructing our raised bed.
We used 4″ screws, a cordless drill, and some sweat & tears because maybe we weren’t 100% sure what we were doing here, but alas, it came together beautifully!
[/cmsms_text][/cmsms_column][cmsms_column data_width=”1/2″][cmsms_gallery layout=”slider” image_size_slider=”medium” slider_effect=”slide” slider_autoplay=”true” slider_slideshow_speed=”7″ slider_animation_speed=”600″ slider_pause_on_hover=”true” slider_rewind=”true” slider_rewind_speed=”1000″ slider_nav_control=”true” animation_delay=”0″]6411|https://www.bgi-usa.com/wp-content/uploads/Fun-Painting-200×200.jpg,6417|https://www.bgi-usa.com/wp-content/uploads/Fun-Painting-3-200×200.jpg,6410|https://www.bgi-usa.com/wp-content/uploads/Fun-Painting-4-200×200.jpg,6409|https://www.bgi-usa.com/wp-content/uploads/Fun-Painting-2-200×200.jpg[/cmsms_gallery][/cmsms_column][/cmsms_row][cmsms_row data_width=”boxed” data_color=”default” data_padding_top=”0″ data_padding_bottom=”10″][cmsms_column data_width=”1/1″][cmsms_heading type=”h3″ font_weight=”400″ font_style=”normal” text_align=”center” target=”self” margin_top=”0″ margin_bottom=”20″ animation_delay=”0″]Step Three: Let’s Put This Thing Together[/cmsms_heading][cmsms_image align=”left” animation_delay=”0″]6412|https://www.bgi-usa.com/wp-content/uploads/The-Project.Improve-This-Ugly-Spot-2-300×300.jpg|medium[/cmsms_image][cmsms_text animation_delay=”0″]
With the space cleared, bed built, soil ready to go, and plants unloaded from the car – it was time to finish this bad boy.
After several layers of soil were down, we decided to start placing the plants, leaving about 2 bags of soil left over to to cover any exposed root balls or fill in additional space. When the plants were arranged just so, we moved on to staging the rest of the area; mulching (for decoration more than anything) and refreshing our parking blocks.
By the way, have you ever tried to move a parking block? They’re heavy. But after a fresh coat of paint and a cumbersome rearrangement, it was all coming together.
[/cmsms_text][/cmsms_column][/cmsms_row][cmsms_row data_width=”boxed” data_padding_left=”3″ data_padding_right=”3″ data_color=”default” data_bg_color=”#ffffff” data_bg_position=”top center” data_bg_repeat=”no-repeat” data_bg_attachment=”scroll” data_bg_size=”cover” data_bg_parallax_ratio=”0.5″ data_color_overlay=”#000000″ data_overlay_opacity=”50″ data_padding_top=”0″ data_padding_bottom=”50″][cmsms_column data_width=”1/2″][cmsms_heading type=”h4″ font_weight=”400″ font_style=”normal” text_align=”center” target=”self” margin_top=”0″ margin_bottom=”20″ animation_delay=”0″]June 2018 “The Finished Product”[/cmsms_heading][cmsms_image align=”center” link=”https://www.bgi-usa.com/wp-content/uploads/The-Project.Improve-This-Ugly-Spot-3.jpg” animation_delay=”0″]6421|https://www.bgi-usa.com/wp-content/uploads/The-Project.Improve-This-Ugly-Spot-3.jpg|full[/cmsms_image][/cmsms_column][cmsms_column data_width=”1/2″][cmsms_heading type=”h4″ font_weight=”400″ font_style=”normal” text_align=”center” target=”self” margin_top=”0″ margin_bottom=”20″ animation_delay=”0″]September 2018 “Garden Update!”[/cmsms_heading][cmsms_gallery layout=”slider” image_size_slider=”full” slider_effect=”slide” slider_autoplay=”true” slider_slideshow_speed=”4″ slider_animation_speed=”600″ slider_pause_on_hover=”true” slider_rewind=”true” slider_rewind_speed=”1000″ slider_nav_control=”true” animation_delay=”0″]6432|https://www.bgi-usa.com/wp-content/uploads/Plants-Doing-Well-5-200×200.jpg,6431|https://www.bgi-usa.com/wp-content/uploads/Plants-Doing-Well-4-200×200.jpg,6430|https://www.bgi-usa.com/wp-content/uploads/Plants-Doing-Well-3-200×200.jpg,6429|https://www.bgi-usa.com/wp-content/uploads/Plants-Doing-Well-2-200×200.jpg,6428|https://www.bgi-usa.com/wp-content/uploads/Plants-Doing-Well-1-200×200.jpg[/cmsms_gallery][/cmsms_column][/cmsms_row]